Manual Paint Sprayers: A Comprehensive Guide (Updated 02/14/2026)
Transitioning from brushes and rollers, modern manual paint sprayers offer efficiency and ease for projects, from sheds to homes, evolving beyond simple aerosol cans․
What is a Manual Paint Sprayer?
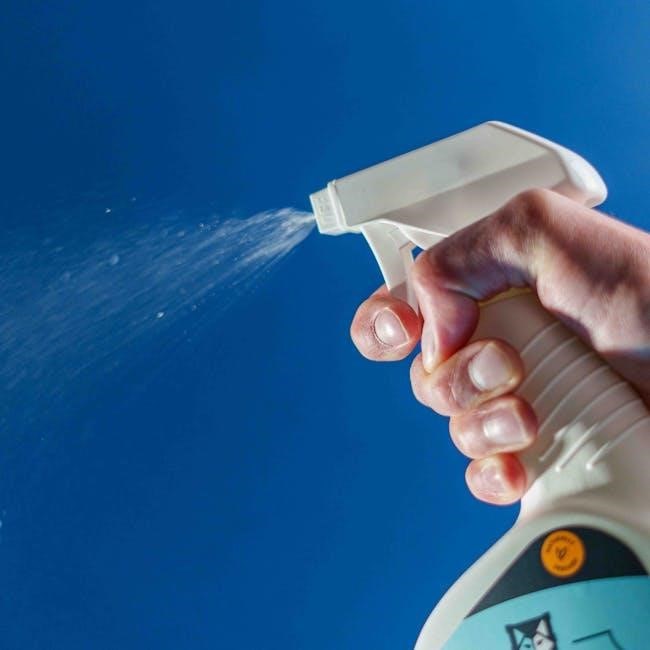
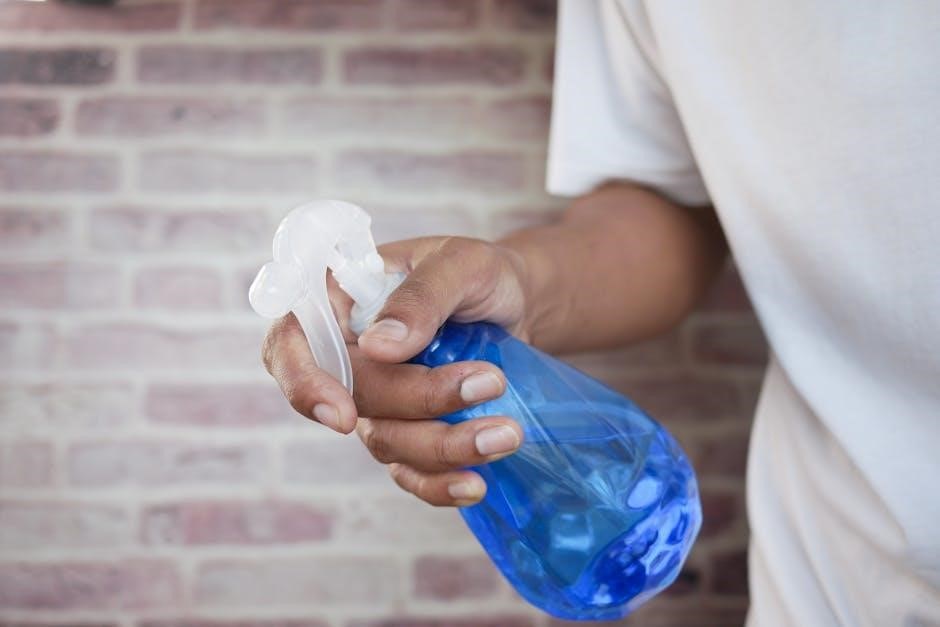
A manual paint sprayer is a versatile tool that utilizes air pressure – either supplied externally or generated internally – to atomize liquid paint into a fine mist․ This mist is then propelled onto a surface, creating an even and efficient coating․ Unlike automated systems, manual sprayers require the operator to physically control the spray gun, offering greater precision for smaller projects and detailed work․
Historically, “spray paint” meant aerosol cans, but today’s manual sprayers represent a significant upgrade․ They allow for the use of a wider variety of paints and finishes, and provide a professional-quality result․ These sprayers are ideal for DIY enthusiasts and professionals alike, tackling tasks from repainting furniture to coating entire walls with relative ease․
Benefits of Using a Manual Paint Sprayer
Manual paint sprayers offer numerous advantages over traditional painting methods․ They dramatically increase efficiency, completing projects much faster than brushes or rollers, especially on large surfaces․ The resulting finish is consistently smooth and even, minimizing brush strokes and roller textures․ This leads to a more professional-looking outcome with reduced material waste․
Furthermore, sprayers can access difficult-to-reach areas with ease, simplifying complex paint jobs․ They are adaptable, handling a wide range of paints and finishes․ Switching from older methods to a quality sprayer improves both the speed and the overall quality of your painting endeavors․
Types of Manual Paint Sprayers
Manual paint sprayers aren’t one-size-fits-all; several types cater to different needs․ HVLP (High Volume Low Pressure) sprayers are popular for their efficiency and reduced overspray, ideal for detailed work․ Airless sprayers deliver paint at high pressure, suitable for larger projects and thicker materials․ They excel at covering substantial areas quickly․
Syphon feed sprayers are a more economical option, drawing paint from a container below the gun, often used for smaller jobs․ Each type has unique strengths, impacting paint transfer, finish quality, and project suitability․ Choosing the right type is crucial for optimal results․
HVLP (High Volume Low Pressure) Manual Sprayers
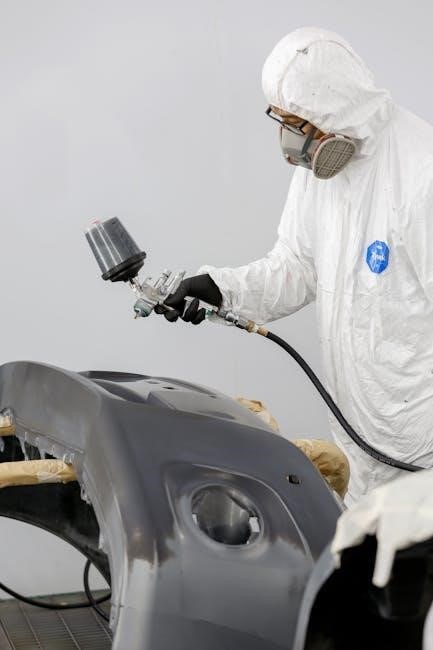
HVLP sprayers are renowned for their efficiency and superior finish quality․ They deliver a high volume of paint at a lower pressure, minimizing overspray and maximizing paint transfer․ This makes them excellent for detailed work, furniture refinishing, and automotive projects where precision is key;
While requiring more skill to operate effectively, HVLP sprayers produce a professional-looking result with less material waste․ They typically need an air compressor to function, adding to the initial investment, but the quality and control they offer are highly valued by experienced users․
Airless Manual Sprayers
Airless manual sprayers excel at tackling larger projects quickly and efficiently․ Unlike HVLP systems, they don’t require a separate air compressor, relying instead on a powerful pump to atomize the paint․ This makes them ideal for exterior house painting, fences, and decks, where speed and coverage are paramount․
While generally easier to use for beginners, airless sprayers can produce more overspray than HVLP models․ Proper technique and masking are crucial to avoid unwanted paint application․ They are capable of handling thicker materials like latex paints and stains with ease․
Syphon Feed Manual Sprayers
Syphon feed manual sprayers represent a cost-effective entry point into the world of paint spraying․ These sprayers feature a paint container positioned below the spray gun, utilizing gravity to assist the paint flow․ This design typically results in a simpler, more lightweight unit, making them suitable for smaller DIY projects․
They often require more frequent refilling due to the smaller container size․ While versatile enough for various paints, they may struggle with thicker coatings compared to airless models․ Syphon feed sprayers are a good choice for touch-ups, furniture refinishing, and crafts․
Key Components of a Manual Paint Sprayer
Understanding the core parts – the gun body, nozzle, fluid tip, air cap, and paint container – is crucial for operation and maintenance of these tools․
Spray Gun Body
The spray gun body serves as the foundational structure, housing the essential mechanisms that control paint flow and airflow․ Typically constructed from materials like aluminum or brass, its durability impacts the sprayer’s longevity and resistance to corrosion from various paints and solvents․ The body integrates the trigger mechanism, which regulates paint release, and the connections for air supply – vital for proper atomization․
Ergonomic design is a key consideration, as extended use demands a comfortable grip to minimize fatigue․ Different body styles cater to specific sprayer types, influencing weight distribution and overall handling․ A well-designed body ensures smooth operation and precise control, contributing significantly to the quality of the finished paint application․
Nozzle
The nozzle is a critical component, directly responsible for atomizing the paint into a fine spray․ Its design dictates the spray pattern – whether it’s a narrow jet, a wide fan, or something in between – influencing coverage and finish quality․ Nozzles are often interchangeable, allowing users to adapt the sprayer for different projects and paint types․
Precision manufacturing is essential; even minor imperfections can lead to uneven spray patterns or clogging․ Regular cleaning is paramount, as dried paint quickly obstructs the narrow opening․ Nozzle size, measured in millimeters or thousandths of an inch, determines the amount of paint delivered, impacting both efficiency and control during application․
Fluid Tip
The fluid tip, working in conjunction with the nozzle, controls the volume of paint released during spraying․ It’s typically a small, replaceable component that screws into the spray gun body․ Different tip sizes are designed for varying paint viscosities and project demands – thicker paints require larger tips, while thinner materials benefit from smaller ones․
Selecting the correct fluid tip is crucial for achieving a consistent and professional finish․ An improperly sized tip can lead to issues like sputtering, uneven coverage, or excessive paint waste․ Like the nozzle, the fluid tip is prone to clogging and requires diligent cleaning after each use to maintain optimal performance and longevity․
Air Cap
The air cap, situated around the nozzle, is responsible for atomizing the paint into a fine spray․ It directs and shapes the airflow, breaking up the liquid paint into tiny droplets for even distribution․ Different air cap designs influence the spray pattern – some create a round pattern, while others produce a flat fan shape, suited for various applications․
Air caps are often adjustable, allowing users to fine-tune the spray characteristics․ Maintaining a clean air cap is vital; paint buildup can disrupt airflow and negatively impact spray quality․ Regular inspection and cleaning ensure consistent atomization and prevent uneven finishes or paint defects․
Paint Cup/Container
The paint cup, or container, holds the paint supply for the sprayer․ Its size dictates how frequently refills are needed during a project, impacting workflow efficiency․ Manual sprayers feature various cup designs – gravity-fed, siphon-feed, and side-mounted – each with unique advantages․
Gravity-fed cups utilize gravity to deliver paint, requiring less operator effort․ Siphon-feed cups draw paint upwards, suitable for larger volumes․ Proper sealing of the paint cup is crucial to prevent leaks and maintain consistent pressure․ Transparent cups allow for easy monitoring of paint levels, avoiding interruptions during application․
Choosing the Right Manual Paint Sprayer
Selecting the ideal sprayer depends on project scope, paint type, budget, and material preferences—brass or aluminum—for optimal performance and longevity․
Project Size and Type
Determining the appropriate manual paint sprayer begins with assessing your project’s demands․ Smaller DIY tasks, like furniture refinishing or crafting, often benefit from syphon feed or HVLP sprayers due to their portability and control․ For larger undertakings – exterior house painting, or extensive fence work – consider airless sprayers․
These deliver higher output and cover substantial areas quickly․ The type of surface also matters; smooth surfaces require finer atomization (HVLP excels here), while rougher textures may need the power of an airless system․ Graco Project Series sprayers are well-suited for mid-sized homeowner projects, bridging the gap between small crafts and larger renovations․ Carefully matching the sprayer to the project ensures efficiency and a professional finish․
Paint Type Compatibility
Manual paint sprayers aren’t universally compatible with all paint types; careful consideration is crucial․ HVLP sprayers generally handle thinner coatings like varnishes, lacquers, and water-based paints effectively, requiring less pressure for atomization․ Airless sprayers, designed for higher viscosity, can tackle thicker paints, stains, and even some exterior coatings․
Syphon feed sprayers offer versatility but may require paint thinning depending on the formulation․ Always consult the sprayer’s manual and the paint manufacturer’s recommendations․ Using incompatible combinations can lead to clogging, uneven application, or sprayer damage․ Proper paint preparation, including filtering, is vital for optimal performance and a flawless finish․
Budget Considerations
The cost of a manual paint sprayer varies significantly, influencing features and build quality․ Entry-level models, suitable for small DIY projects, can be found for under $100, often featuring basic functionality and plastic components․ Mid-range sprayers, offering improved durability and versatility, typically range from $100 to $300;
Professional-grade sprayers, constructed with brass or high-quality aluminum, can exceed $300, providing superior performance and longevity․ Consider not only the initial purchase price but also the cost of accessories like nozzles, filters, and cleaning supplies․ Investing in a slightly more expensive, well-built sprayer can save money in the long run through reduced maintenance and replacement costs․
Sprayer Material (Brass vs․ Aluminum)
The material of a manual paint sprayer – brass or aluminum – significantly impacts its durability and suitability for different paints․ Brass sprayers are renowned for their robustness and resistance to corrosion, making them ideal for use with solvent-based paints and coatings․ However, they tend to be heavier and more expensive than aluminum counterparts․
Aluminum sprayers offer a lighter weight and a more affordable price point, making them suitable for water-based paints and smaller projects․ While generally durable, aluminum can be susceptible to corrosion when exposed to certain chemicals․ Choosing the right material depends on the types of paints you’ll be using and the frequency of use․
Preparing for Spraying with a Manual Paint Sprayer
Proper preparation is key for successful spraying; this includes carefully thinning and filtering paints, ensuring adequate workspace ventilation, and utilizing essential safety gear․
Paint Preparation (Thinning & Filtering)
Achieving the correct paint viscosity is crucial for optimal sprayer performance․ Many paints require thinning to ensure smooth atomization and prevent clogging within the sprayer’s components․ Refer to the paint manufacturer’s recommendations for appropriate thinning ratios, typically using mineral spirits or water, depending on the paint type․
Equally important is filtering the paint before use․ This removes any particles or debris that could obstruct the nozzle and disrupt the spray pattern․ Utilize fine-mesh paint filters, readily available at hardware stores, and secure them over the paint container opening during pouring․ Thorough paint preparation significantly minimizes issues during the spraying process and contributes to a professional finish․
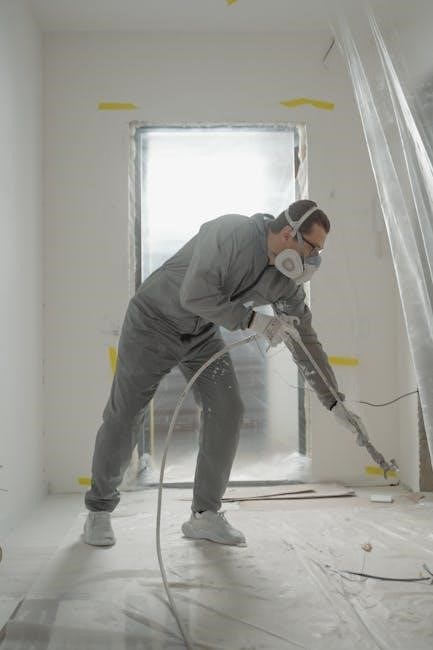
Workspace Preparation (Ventilation & Protection)
Prior to spraying, meticulous workspace preparation is paramount for both safety and quality․ Adequate ventilation is non-negotiable, as paint fumes can be hazardous․ Open windows and doors, or utilize fans to circulate air, ensuring a constant flow of fresh air throughout the work area․
Protect surrounding surfaces from overspray․ Cover floors, furniture, and any items you wish to remain paint-free with drop cloths, plastic sheeting, or masking paper․ Thoroughly mask off trim, windows, and other areas requiring precise paint lines․ A well-prepared workspace minimizes cleanup and ensures a professional-looking result․
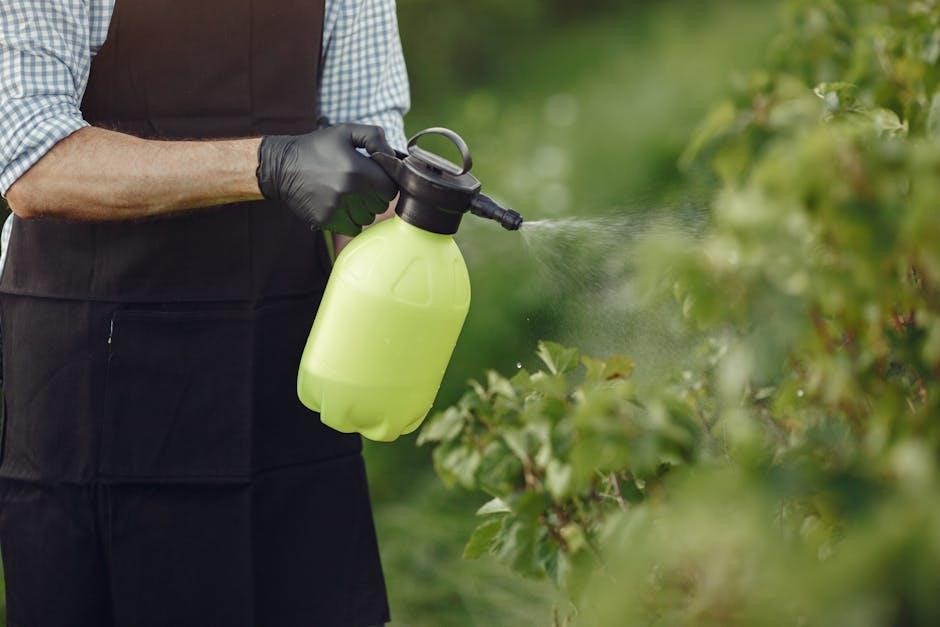
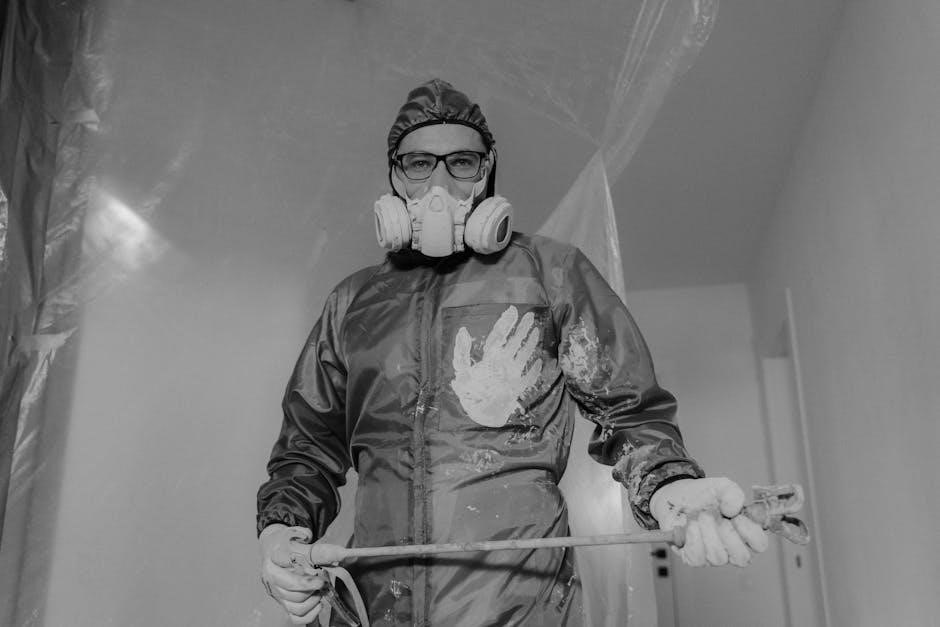
Safety Gear (Mask, Gloves, Eye Protection)
Protecting yourself during paint spraying is crucial for health and well-being․ A respirator or mask is essential to prevent inhalation of harmful paint fumes and particles, safeguarding your respiratory system․ Nitrile gloves shield your skin from paint contact, preventing irritation and ensuring a clean grip․
Eye protection is non-negotiable․ Wear safety glasses or a face shield to prevent paint from entering your eyes, which could cause severe irritation or damage; Proper safety gear minimizes health risks and allows you to focus on achieving a flawless finish with your manual paint sprayer․
Spraying Techniques for Optimal Results
Achieving a professional finish requires consistent speed, proper distance, and overlapping passes, while diligently avoiding common issues like runs and sags․
Proper Spray Distance
Maintaining the correct spray distance is crucial for a flawless finish with your manual paint sprayer․ Generally, a distance of 6-8 inches from the surface is recommended as a starting point, but this can vary depending on the type of sprayer and the paint being used․
Too close, and you risk runs and drips; too far, and you’ll encounter dry spray and reduced adhesion․ Experiment on a test surface first to dial in the optimal distance for your specific setup․ Observe the spray pattern – it should be even and consistent, without any sputtering or orange peel texture․

Consistent distance is just as important as the initial setting․ Practice maintaining a steady hand and smooth movement to ensure uniform coverage across the entire project․
Consistent Spray Speed and Movement
Achieving a professional finish with a manual paint sprayer hinges on consistent speed and movement․ A smooth, even pass is paramount; avoid jerking or stopping mid-stroke․ Maintain a pace that allows for adequate material application without causing runs or drips․
Think of it like mowing a lawn – overlap each pass slightly (around 50%) to ensure complete coverage and prevent striping․ Keep your arm moving in a fluid, back-and-forth motion, maintaining a consistent distance from the surface․
Practice makes perfect! A steady hand and controlled movement will dramatically improve the quality of your paint job․
Overlapping Passes
Consistent, overlapping passes are crucial for achieving uniform coverage when using a manual paint sprayer․ Each stroke shouldn’t be a standalone application; instead, slightly overlap the previous one – typically by 50% – to eliminate gaps and ensure a seamless finish․
This technique blends the edges of each pass, preventing visible lines or variations in paint thickness․ Imagine laying shingles on a roof; the overlap creates a watertight seal․ Similarly, overlapping spray passes create a consistently coated surface․
Proper overlap minimizes the risk of streaking and ensures a professional, even appearance․
Avoiding Runs and Sags
Runs and sags are common issues when using a manual paint sprayer, often stemming from applying too much paint in one area․ Maintaining a consistent spray distance and speed is paramount to prevention․ Avoid dwelling on one spot, as this leads to paint buildup and eventual dripping․
If you notice paint beginning to pool, immediately cease spraying in that area and feather the edges to blend it with surrounding, thinner coats․ Applying multiple, light coats is always preferable to a single, heavy one․
Gravity plays a role; be mindful of spraying on vertical surfaces․

Cleaning and Maintenance of Manual Paint Sprayers
Consistent cleaning immediately after use, alongside deep cleaning procedures, ensures optimal performance and extends the lifespan of your manual paint sprayer․
Immediate Post-Use Cleaning
Prompt action is crucial after each spraying session․ Failing to clean your manual paint sprayer immediately allows paint to dry and harden within the components, leading to frustrating clogs and potential damage․ Begin by emptying any remaining paint from the cup or container․ Then, flush the system with the appropriate cleaning solvent – typically water for latex paints and mineral spirits for oil-based paints․
Trigger the sprayer until the solvent runs clear, ensuring all paint residue is removed from the nozzle, fluid tip, and internal passages․ Disassemble easily removable parts like the paint cup and briefly rinse them․ This quick routine prevents build-up and maintains the sprayer’s efficiency for the next project, saving you time and money in the long run․
Deep Cleaning Procedures
Beyond immediate rinsing, a thorough deep clean is essential periodically․ Disassemble the manual paint sprayer completely, referring to the manufacturer’s instructions․ Soak all removable parts – nozzle, fluid tip, air cap, and paint cup – in the appropriate cleaning solvent for several hours, or even overnight for stubborn residue․
Use small brushes or specialized cleaning tools to scrub away any remaining paint deposits․ Pay close attention to the tiny orifices of the nozzle and fluid tip, ensuring they are completely clear․ Reassemble the sprayer carefully, lubricating any necessary parts with a silicone-based lubricant․ A deep clean restores optimal performance and extends the lifespan of your equipment․
Nozzle and Tip Maintenance
The nozzle and fluid tip are critical for consistent spray patterns; therefore, regular maintenance is paramount․ After each use, even with immediate cleaning, residue can build up, causing clogs or uneven spraying․ Inspect both components for any signs of wear or damage, replacing them if necessary․
Periodically, use a fine wire or specialized nozzle cleaning tools to carefully clear any obstructions․ Avoid using metal objects that could enlarge or damage the precision openings․ Proper nozzle and tip care ensures a fine, even finish and prevents costly repairs or replacements, maximizing sprayer efficiency․
Storage Best Practices
Proper storage extends the life of your manual paint sprayer and ensures it’s ready for the next project․ After thorough cleaning, store the sprayer in a dry, dust-free environment․ Disconnect any air hoses and store them separately to prevent cracking or damage․
Avoid storing the sprayer in extreme temperatures, as this can affect the seals and internal components․ A dedicated case or container is ideal for protection․ Regularly inspect the sprayer before use, even after storage, to confirm all parts are functioning correctly and prevent unexpected issues during operation․
Troubleshooting Common Issues
Addressing clogging, uneven patterns, and splattering is crucial for consistent results; proper maintenance and technique resolve most problems encountered with manual sprayers․
Clogging Nozzles
Clogged nozzles are a frequent frustration when using manual paint sprayers, significantly impacting spray patterns and finish quality․ Often, this occurs due to dried paint particles accumulating within the small nozzle opening․ Preventative measures are key: always thoroughly flush the sprayer immediately after each use, and diligently filter your paint before pouring it into the cup․
If clogging occurs, begin by shutting off the air supply and disconnecting the nozzle․ Soak the nozzle in appropriate solvent (following manufacturer’s guidelines) for the recommended duration․ Gently use a fine wire or nozzle cleaning kit – never metal objects that could damage the precision opening – to dislodge any remaining debris․ Regular cleaning dramatically reduces the likelihood of future blockages, ensuring smooth and consistent operation․
Uneven Spray Patterns
An uneven spray pattern with a manual paint sprayer often signals an issue beyond a simple clog․ Several factors contribute to this problem, including inconsistent spray distance, improper overlapping of passes, or fluctuating air pressure․ Maintaining a consistent distance from the surface is crucial; too close causes pooling, while too far results in a dry, textured finish․
Ensure each pass overlaps the previous one by approximately 50% for uniform coverage․ Verify your air compressor is delivering stable pressure throughout the project․ A partially restricted air supply can lead to sputtering and inconsistent paint flow․ Finally, check the fluid tip for wear or damage, as this directly impacts atomization and pattern quality․
Paint Splattering
Excessive paint splattering during manual spraying indicates a few potential issues․ Often, the paint is too thick for the sprayer, hindering proper atomization and causing droplets to form instead of a fine mist․ Proper thinning, according to the paint manufacturer’s instructions, is essential․ Another common cause is insufficient air pressure, preventing the paint from being adequately broken down․
Inspect the air cap for damage or obstructions, as this component plays a vital role in shaping the spray pattern․ Also, ensure you’re using the correct fluid tip size for the paint viscosity․ Finally, a fast spraying speed can contribute to splattering; maintain a consistent, moderate pace for optimal results․