Understanding Manual Transmission Reverse
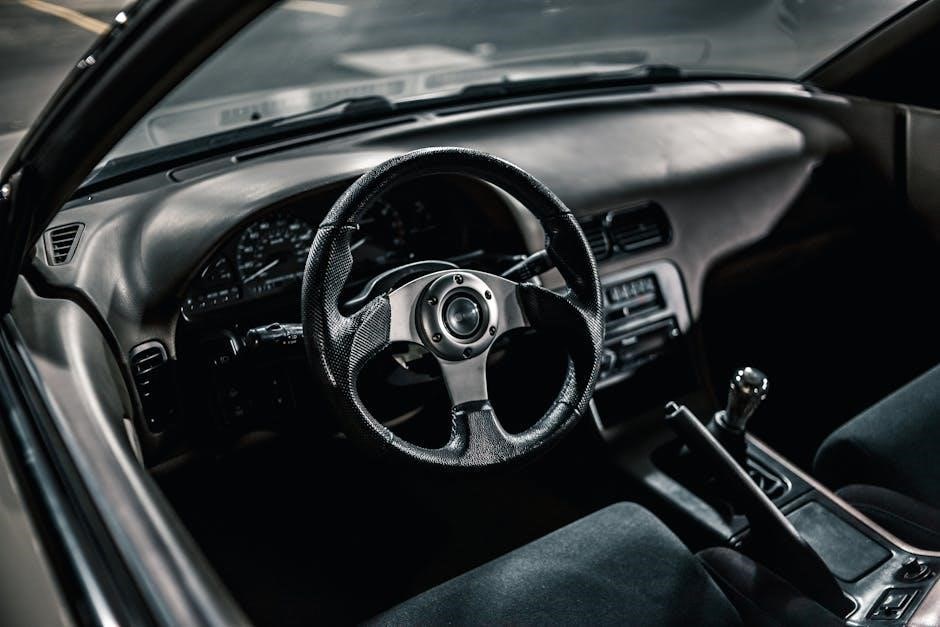
Reversing a manual transmission vehicle requires specific techniques, often differing by vehicle origin; European cars may utilize a collar, while others benefit from a “first gear” method.
Successfully engaging reverse involves understanding clutch control and the transmission’s design, ensuring smooth and controlled maneuvering.
Why Reverse Can Be Tricky
Engaging reverse in a manual transmission can present unique challenges due to several design and mechanical factors. Unlike forward gears, reverse often lacks synchronizers, requiring precise clutch and shifter coordination to avoid grinding noises. The absence of synchronization means the gear speeds must match perfectly during engagement.
Furthermore, the reverse gear ratio is typically higher than first gear, resulting in a faster engagement speed, making smooth transitions more difficult. Many older or Japanese vehicles employ a specific technique – briefly shifting into first gear before attempting reverse – to align gear speeds. European models frequently incorporate a collar or button mechanism that must be activated before selecting reverse, adding another layer of complexity for unfamiliar drivers.
Riding the clutch, while sometimes discouraged, is often necessary for controlled reversing, especially on inclines, as fully disengaging it can lead to loss of vehicle control.
The Role of the Clutch
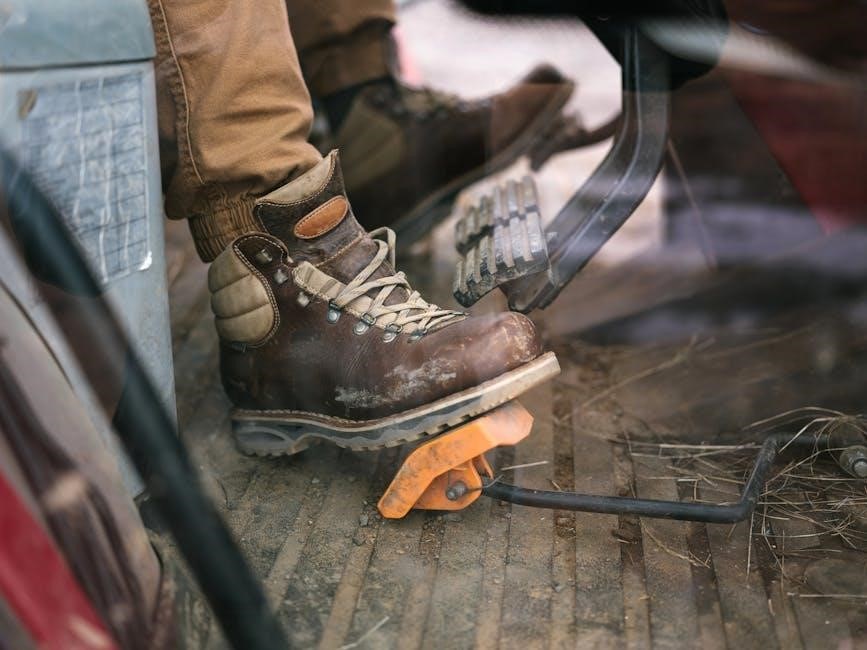
The clutch is absolutely central to successfully engaging reverse in a manual transmission. Its primary function is to disconnect the engine from the transmission, allowing for gear changes without damaging the drivetrain. When reversing, fully depressing the clutch pedal disengages the engine, enabling the driver to select reverse gear.
However, complete disengagement isn’t always ideal during the actual reverse maneuver. “Riding” the clutch – partially engaging it – provides crucial control, preventing stalling and allowing for slow, precise movements. This is particularly important when reversing on inclines or maneuvering in tight spaces.
The clutch facilitates the necessary speed matching between the engine and transmission for a smooth, grind-free engagement, especially vital given reverse gear’s often unsynchronized nature.
Common Reverse Gear Mechanisms
Manual transmissions employ varied reverse mechanisms, including direct engagement, collar/button systems (common in Europe), and lockout features to prevent accidental engagement.
These designs influence the technique needed for smooth reverse gear selection.
Direct Engagement Reverse
Direct engagement reverse is a straightforward system found in many older and some modern manual transmissions. It allows the driver to shift directly into reverse from neutral without needing any additional actions like lifting a collar or pressing a button.
However, this simplicity can sometimes make it tricky. Because reverse gear often lacks synchronizers – components that match the speeds of the gears – a complete stop is crucial. Attempting to engage reverse while even slightly moving forward can result in grinding noises.
The technique often involves momentarily shifting into first gear, then moving the shifter directly into reverse. This helps align the gear speeds, facilitating a smoother engagement. Mastering this method requires practice and a feel for the transmission’s mechanics.
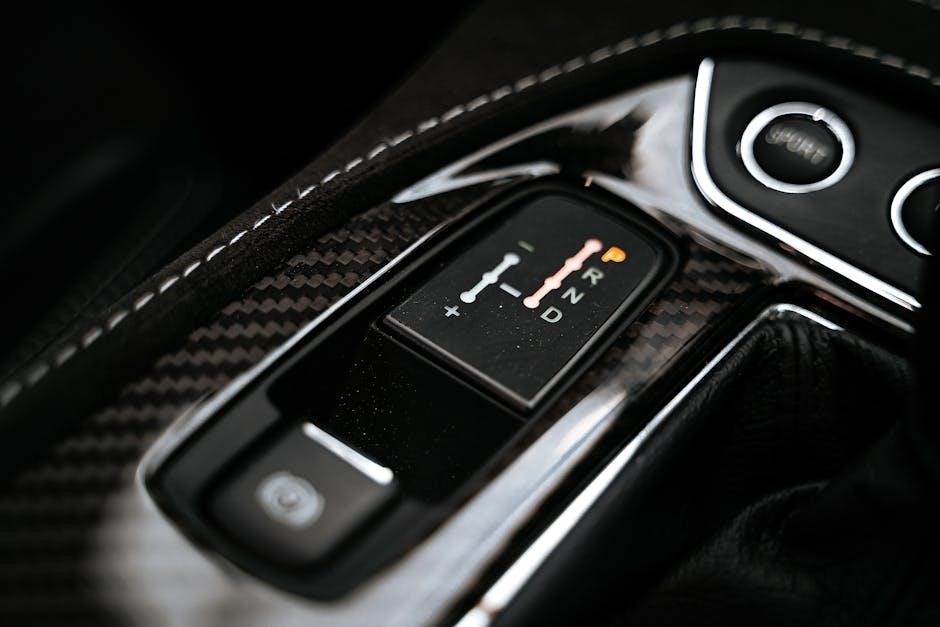
Reverse with a Collar/Button
Many European manual transmission vehicles employ a reverse lock-out mechanism utilizing a collar or button. This feature prevents accidental engagement of reverse while driving forward, enhancing safety. Typically, the driver must lift a collar surrounding the gear knob or press a button on the shifter before moving the lever into reverse.
This action disengages the lock-out, allowing access to the reverse gear. It’s a crucial step often unfamiliar to drivers accustomed to North American vehicles. Failing to operate the collar or button will prevent the shifter from entering the reverse position.
Understanding this system is vital when renting a car in Europe, as it’s a common design element. The collar might require lifting up or pushing down, depending on the vehicle model.
Reverse Lockout Mechanisms
Reverse lockout mechanisms are safety features integrated into manual transmissions to prevent accidental engagement of reverse gear at higher speeds. These systems aim to avoid potential damage to the transmission and maintain vehicle control. Several designs exist, including mechanical and hydraulic systems.
Commonly, a mechanical lock-out requires a deliberate action – like lifting a collar or pressing a button – to bypass the restriction before shifting into reverse. This ensures the driver consciously selects reverse. Some systems utilize a solenoid activated by the vehicle’s speed, preventing reverse engagement above a certain threshold.
These mechanisms are essential for preventing unintended reverse movement, particularly during spirited driving or in situations demanding quick gear changes.
Step-by-Step Guide to Engaging Reverse
First, ensure a complete stop, then depress the clutch fully. Shift to neutral, and utilize the “first gear” method before carefully engaging reverse for control.
Step 1: Complete Stop
Before attempting to engage reverse in a manual transmission vehicle, it is absolutely crucial to bring the car to a complete and utter standstill. This isn’t merely a slow roll; the vehicle must be fully stationary. Applying the brake firmly ensures this, preventing any forward or backward momentum.
Attempting to shift into reverse while the car is still moving, even slightly, can lead to grinding noises, potential damage to the transmission, and a failed engagement. A complete stop provides the necessary mechanical stillness for the synchronizers within the transmission to properly align and allow for a smooth shift into reverse. Prioritizing this initial step safeguards your vehicle and ensures a controlled reversing maneuver.
Step 2: Neutral Position
Once the vehicle is at a complete stop, the next essential step is to confirm that the gear selector is firmly positioned in the neutral position. This disengages the engine from the wheels, allowing for free movement of the shift lever. Wiggle the gear stick gently to verify it’s not lightly resting on another gear.
Attempting to shift into reverse from a gear, even if you believe it’s fully disengaged, can cause unnecessary strain on the transmission components. Being absolutely certain of neutral prevents grinding and ensures a clean transition when you depress the clutch and prepare to select reverse. It’s a foundational step for smooth and damage-free reversing.
Step 3: Depress the Clutch
With the vehicle stopped and in neutral, fully depress the clutch pedal. This action disengages the engine from the transmission, allowing you to freely move the gear selector without causing the engine to attempt to turn the drivetrain. Pressing the clutch all the way to the floor is crucial for a smooth shift into reverse.
Don’t “ride” the clutch – a complete depression is necessary. Some sources emphasize that briefly releasing and re-depressing the clutch can aid engagement, but a full, firm press is the initial requirement. This ensures the gears aren’t under load when you attempt to select reverse, preventing grinding and potential damage.
Step 4: The “First Gear” Method
Many manual transmissions, particularly older models or those from certain manufacturers like older Mitsubishi Lancers, benefit from the “first gear” method. After fully depressing the clutch, firmly shift the gear lever into first gear. Then, while holding the clutch down, gently but decisively move the lever further to the right, past the first gear position, into reverse.
This technique works because of the physical layout of the gears within the transmission. It’s a function of the design, aligning the gears for a smoother engagement. It’s not a transmission problem, but a characteristic of how some systems operate. This method often bypasses any reverse lockout mechanisms.
Step 5: Engaging Reverse
Once the shifter is positioned towards reverse – whether using the direct method or the “first gear” technique – apply gentle but firm pressure. Avoid forcing the lever; if it resists, return to neutral and repeat the process. Remember to maintain consistent pressure on the clutch pedal throughout this maneuver.
Successful engagement will feel distinct, often with a slight click. Immediately after reverse engages, modulate the clutch carefully to control vehicle speed. Remember, reverse gear engages more quickly than first, requiring delicate clutch control to prevent jerking or stalling. Practice smooth transitions for confident reversing.
Troubleshooting Reverse Engagement Issues
Difficulty shifting, grinding noises, or a popping-out gear indicate potential problems; these issues often stem from clutch wear, linkage adjustments, or internal transmission components.
Difficulty Shifting into Reverse
Experiencing trouble engaging reverse is a common frustration with manual transmissions. Often, it’s not a transmission flaw, but a design characteristic requiring a specific technique. The key is understanding the synchronizers and how they interact. Many vehicles necessitate a complete stop before attempting to shift into reverse.
A helpful method involves briefly shifting into first gear, then immediately attempting to move the shifter into reverse. This “first gear” method aligns the gears, facilitating smoother engagement. Ensure the clutch is fully depressed during these maneuvers. If difficulty persists, try gently rocking the vehicle back and forth while attempting to shift. Ignoring this can lead to unnecessary wear on the synchronizers.
Furthermore, a worn clutch can contribute to shifting difficulties, as it may not fully disengage the transmission.
Grinding Noises When Shifting
Hearing a grinding noise when attempting to engage reverse indicates a synchronization issue between the gears. This typically happens when the transmission input shaft and the reverse gear aren’t rotating at the same speed. Avoid forcing the shifter; this exacerbates the problem and causes further damage to the gear teeth.
The “first gear” method – briefly shifting into first before attempting reverse – can often resolve this by bringing the gears closer to matching speeds. Ensure a fully depressed clutch is maintained throughout the process. Repeated grinding suggests potential issues with the clutch, synchronizers, or even low transmission fluid.
Ignoring grinding noises can lead to significant transmission damage, requiring costly repairs. Prompt diagnosis and addressing the root cause are crucial for longevity.
Reverse Gear Pops Out
If the reverse gear repeatedly pops out of engagement, it suggests a problem with the shift linkage or the reverse gear’s internal components. Worn or damaged shift linkage bushings can create excessive play, allowing the gear to disengage under even slight pressure.
Internally, a worn reverse gear, damaged shift forks, or a weak detent spring can also cause this issue. Applying slight upward or downward pressure on the shifter while reversing might temporarily hold it in place, but this is a workaround, not a fix.
This situation requires professional inspection and repair to prevent complete gear disengagement and potential transmission failure. Ignoring it can lead to loss of control while reversing.
Vehicle-Specific Considerations
Reverse techniques vary significantly by region; European cars often feature collar mechanisms, while Japanese models may utilize the “first gear” method for smoother engagement.
European Car Reverse Collars
Many European manual transmission vehicles employ a unique reverse engagement system utilizing a collar on the gear shift knob. This collar, often requiring an upward pull or a downward push, unlocks the reverse gear, preventing accidental engagement while driving forward.
This mechanism is a safety feature, as reverse gear typically lacks synchronization. Drivers renting cars in Europe frequently encounter this system, finding it different from North American or Japanese vehicle designs. Understanding this collar function is crucial for successfully and safely reversing these vehicles. Failure to operate the collar correctly will result in an inability to shift into reverse.
The specific action – pull up or push down – varies by manufacturer and model, so familiarizing yourself with the vehicle’s specifics is essential before attempting to reverse.
Japanese Car Reverse Techniques
Older Japanese manual transmission vehicles often utilize a technique where shifting into first gear before attempting reverse is necessary for successful engagement. This method circumvents synchronization issues inherent in reverse gear design.
The process involves a deliberate shift into first, followed immediately by a continuation of the shifter movement into the reverse position. This “first gear” method isn’t unique to Japanese cars, but it’s commonly found in 1990s models. It’s a function of the transmission’s internal design, not a defect.
Drivers accustomed to European collar systems or direct engagement may find this technique counterintuitive, but it’s a reliable way to engage reverse in these vehicles.
Older Vehicle Reverse Mechanisms
Reverse gear mechanisms in older vehicles frequently lacked the synchronization found in modern transmissions, making engagement more challenging. These systems often relied heavily on driver technique and precise clutch control for smooth operation.
The “first gear” method – shifting into first and then into reverse – was particularly common as a workaround for this lack of synchronization. This technique helped align the gears, facilitating engagement.
Furthermore, wear and tear on older transmissions could exacerbate these issues, requiring a more deliberate and forceful engagement of reverse. Proper clutch engagement and a complete stop were crucial to avoid grinding.

Reverse Gear Design & Function
Reverse gear mechanisms control travel and speed, differing by design; some utilize specific controls for efficient operation and maneuvering in tight spaces.
Reverse Gear Travel Mechanism Control
The control of the reverse gear travel mechanism is intrinsically linked to the transmission’s overall design and the driver’s technique. Many manual transmissions require a deliberate action – often depressing or lifting a collar on the shift knob – to unlock the reverse gear engagement. This prevents accidental engagement while driving forward.
This mechanism ensures the gear isn’t inadvertently selected during normal operation. Some systems, particularly in older vehicles or specific Japanese models, utilize the “first gear” method, where the shifter is momentarily moved to first before engaging reverse. This bypasses a lockout, facilitating smoother engagement. The design aims to provide a controlled and intentional movement into reverse, enhancing safety and preventing damage to the transmission components.
Reverse Gear Speed Control
Controlling speed in reverse with a manual transmission demands precise clutch and throttle modulation. Unlike forward gears, reverse typically has a lower gear ratio, resulting in greater torque but limited speed. Maintaining a slow, controlled pace is crucial for safety and maneuverability.
Drivers often “ride the clutch” slightly while reversing, maintaining a delicate balance between engagement and disengagement to prevent stalling or sudden movements. Avoiding abrupt throttle inputs is essential, as the increased torque can lead to jerky motions. Smooth, incremental adjustments to both clutch and throttle allow for precise speed control during reversing maneuvers, especially in tight spaces or on inclines.
Safety Precautions When Reversing
Always check your surroundings, move slowly, and utilize mirrors/cameras when reversing a manual transmission vehicle to prevent accidents and ensure pedestrian safety.
Clearance and Surroundings
Before attempting to reverse a manual transmission vehicle, a thorough assessment of the surrounding area is paramount. This isn’t merely a glance; it requires a comprehensive scan for pedestrians, other vehicles, obstacles, and even low-lying objects that might cause damage.
Ensure sufficient clearance exists both in front of and to the sides of your intended reversing path. Remember, visibility is often limited when reversing, so anticipate potential hazards beyond your immediate line of sight. Walk around the vehicle if necessary to confirm a clear path, especially in unfamiliar or congested environments.
Pay close attention to children and pets, as they may be unpredictable and difficult to spot. Utilize all available aids, such as mirrors and backup cameras, but never rely on them solely – always physically check your surroundings.
Slow and Controlled Movement
When reversing a manual transmission vehicle, prioritize slow and controlled movement above all else. Avoid abrupt acceleration or jerky steering inputs, as these can easily lead to loss of control, particularly on uneven surfaces. Gently modulate the clutch and throttle to maintain a steady, creeping pace.
Be prepared to stop immediately if an unexpected obstacle appears. Feathering the clutch allows for precise speed adjustments, crucial for navigating tight spaces. Remember, reversing isn’t about speed; it’s about careful maneuvering.
Maintain a firm grip on the steering wheel and be mindful of the vehicle’s rear swing. Smooth, deliberate actions are key to a safe and successful reverse maneuver.
Using Mirrors and Cameras
Effectively utilizing mirrors and cameras is paramount when reversing a manual transmission vehicle. Relying solely on direct vision is insufficient due to significant blind spots. Continuously scan all mirrors – side and rearview – to maintain comprehensive awareness of your surroundings.
If your vehicle is equipped with a backup camera, use it in conjunction with the mirrors, not as a replacement. Cameras offer a wider field of view but can distort distances. Regularly check for pedestrians, obstacles, and other vehicles.
Slow, deliberate head checks complement mirror usage, confirming what the mirrors display. Prioritize safety by maximizing visual information before and during the reversing process.
Advanced Techniques
Mastering smooth reverse turns and navigating inclines demands precise clutch control, coordinated steering, and a nuanced understanding of the vehicle’s momentum.
Smooth Reverse and Turning
Achieving a smooth reverse and turn requires a delicate balance of clutch control, steering input, and spatial awareness. Begin by fully depressing the clutch and selecting reverse gear as previously outlined. Slowly release the clutch while simultaneously applying a gentle pressure to the steering wheel in the desired turning direction.
Avoid abrupt clutch engagement, as this can cause jerking or stalling. Instead, find the friction point where the car begins to move and maintain it while carefully modulating the steering. For tighter spaces, a slightly higher engine RPM can provide more control, but be cautious not to over-rev. Remember to constantly scan your surroundings and use your mirrors to ensure a safe maneuver.
Practice in an open area to develop muscle memory and refine your technique. The goal is a fluid, controlled movement, not speed.
Reversing on Inclines
Reversing a manual transmission vehicle uphill demands heightened clutch control to prevent rollback. Begin by fully depressing the clutch and selecting reverse. Gradually release the clutch while simultaneously applying the handbrake to hold the vehicle stationary.
As you feel the friction point, slowly release the handbrake and continue releasing the clutch, adding a small amount of gas to maintain momentum. Avoid releasing the handbrake completely until you’re confident the engine can overcome gravity. Downhill, use the engine as a brake, gently applying the clutch to control speed, and be prepared to brake if needed.
Constant awareness of the incline’s steepness and your vehicle’s capabilities is crucial for a safe and controlled reversal.

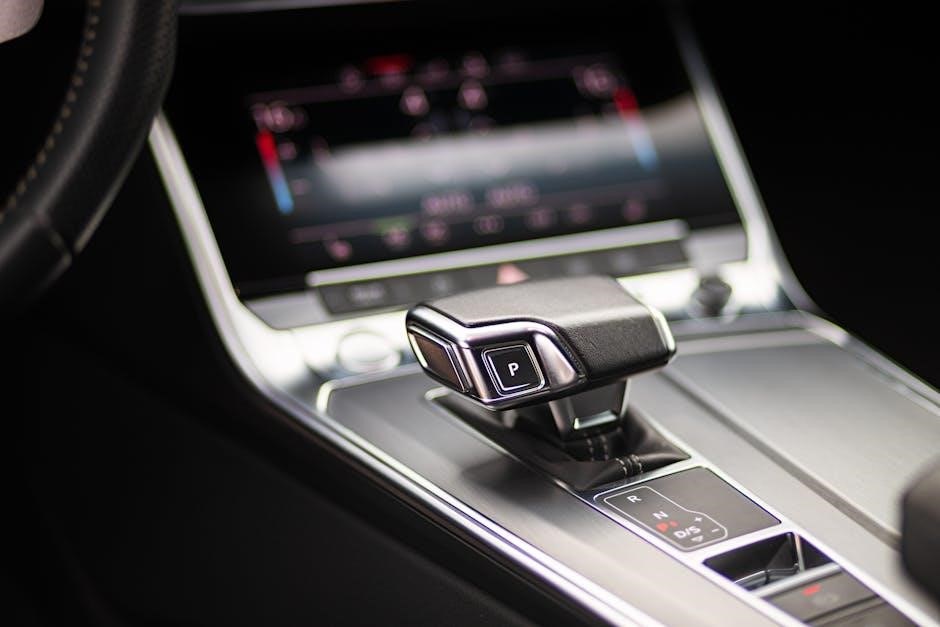
Automatic Transmission Reverse Clutch Assembly
While focusing on manual transmissions, understanding automatic systems reveals reverse utilizes a dedicated clutch assembly for engagement, differing significantly from manual gear selection processes.
High Clutch Removal and Installation
Although primarily concerning automatic transmissions, the principles of clutch pack disassembly and reassembly offer insight into power transfer mechanics relevant to understanding any transmission system. Removing the high clutch typically involves carefully releasing retaining clips and lifting the clutch pack straight up, noting the orientation of each component for correct reinstallation.
Installation requires precise alignment of the clutch pack with the transmission housing, ensuring smooth engagement and preventing damage. New seals and friction discs are often recommended during reassembly to maintain optimal performance; This process, while specific to automatics, highlights the critical role of friction and pressure in transmitting rotational force – a fundamental concept applicable to both automatic and manual transmissions when considering reverse gear engagement.
Reverse Clutch Removal and Installation
Similar to high clutch procedures, reverse clutch service within an automatic transmission demands meticulous attention to detail. Removal begins by releasing retaining hardware and carefully lifting the reverse clutch pack, observing component arrangement for accurate reassembly. Inspecting friction discs and steel plates for wear is crucial; replacement is often necessary for reliable operation.
Installation requires precise alignment and proper seating of the clutch pack, ensuring full engagement when activated. New seals should always be installed to prevent fluid leaks and maintain hydraulic pressure. While focused on automatics, understanding these clutch mechanisms illustrates the core principles of controlled power transfer, offering a broader perspective on how reverse functions in any transmission type.