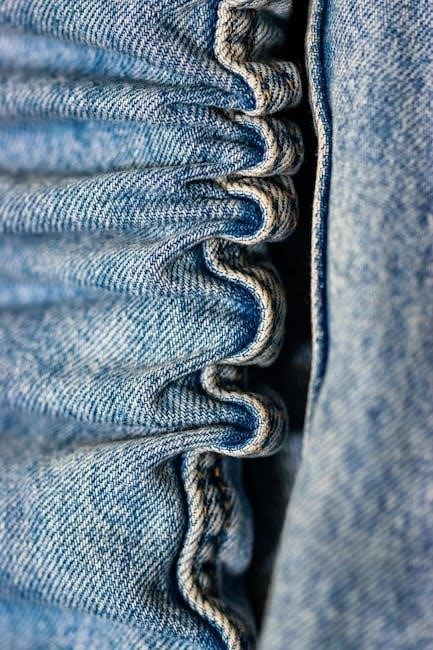
French seams are a beautiful, durable seam finish ideal for delicate fabrics and garments; they encase raw edges, preventing fraying and offering a clean interior.
What is a French Seam?
A French seam is a seam finish where the raw edges of fabric are completely enclosed within the seam allowance, creating a very clean and durable finish. Unlike a standard seam, which often requires edge finishing like zig-zag stitching or serging to prevent fraying, a French seam inherently contains those raw edges.
The process involves sewing the fabric wrong sides together with a narrow seam allowance, trimming, pressing, and then encasing the seam allowance within another seam. This results in a seam that looks neat on both the inside and outside of the garment, making it a popular choice for blouses, dresses, and lingerie where a professional finish is desired. It’s particularly useful for sheer or lightweight fabrics prone to unraveling.
Why Use a French Seam?
French seams offer several advantages over traditional seam finishes. Primarily, they provide exceptional durability, as the enclosed raw edges are protected from fraying and wear, extending the garment’s lifespan. They are ideal for fabrics that unravel easily, like chiffon or silk, eliminating the need for additional finishing techniques.
Beyond practicality, French seams create a beautifully clean and professional interior, enhancing the overall quality of the project. They are also less bulky than many other seam finishes, making them suitable for delicate fabrics or areas requiring a smooth finish. This technique is favored in high-end garment construction and cosplay due to its refined appearance and lasting strength.
Tools and Materials Needed
Essential supplies include fabric, a sewing machine, sharp scissors, pins for securing fabric, and an iron for crisp, professional pressing throughout the process.
Fabric Selection
Choosing the right fabric is crucial for successful French seams. Lightweight to medium-weight woven fabrics, like cotton, linen, and silk, work exceptionally well, as they press easily and allow for neat encasement of raw edges. Avoid very bulky or stretchy fabrics initially, as they can make the process more challenging.
Sheer or delicate fabrics truly benefit from French seams, as they provide a refined finish and prevent fraying without visible seam allowances. For beginners, practice with a stable cotton before moving onto more slippery materials. Consider the fabric’s weight when determining seam allowance widths; lighter fabrics may require narrower allowances for a cleaner result. Ultimately, a fabric that presses well and doesn’t unravel easily is ideal for mastering this technique.
Sewing Machine Requirements
Fortunately, French seams don’t demand a specialized sewing machine! A standard machine with basic straight stitch capabilities is perfectly sufficient. However, having adjustable stitch length is beneficial, allowing you to fine-tune for different fabric weights. A consistent stitch length of around 2.5mm is a good starting point for most woven fabrics.
While not essential, a needle threader can save time and frustration. Ensure your machine is properly threaded and tension is balanced for clean, even stitches. A walking foot can be helpful when working with slippery or multiple layers of fabric, preventing shifting during sewing. Regularly cleaning and maintaining your machine will also contribute to optimal performance when creating these delicate seams.
Essential Tools (Scissors, Pins, Iron)
Creating French seams requires a few key tools for precision and a professional finish. Sharp fabric scissors are crucial for accurate cutting, while dressmaker’s pins securely hold fabric layers together during sewing. A good quality iron and ironing board are absolutely essential; pressing each stage of the seam is vital for a neat, flat result.
Consider using a seam gauge for consistent seam allowances. A rotary cutter and cutting mat can also speed up fabric preparation. A point turner helps create crisp corners. Don’t underestimate the power of a well-equipped sewing kit – having the right tools makes the process significantly easier and more enjoyable!

Step-by-Step French Seam Tutorial
Follow these steps to master the French seam: begin with wrong sides together, sew a narrow seam, trim, press, encase, and finish with a second seam.
Step 1: Wrong Sides Together
Begin by placing your fabric pieces with their wrong sides facing each other. This is the opposite of how you typically sew a standard seam, where right sides are together. This initial step is crucial for creating the enclosed seam characteristic of a French seam. Pin the fabric pieces securely along the edge you intend to sew, ensuring they remain aligned throughout the process. A consistent pinning distance will contribute to a neat and even seam. Remember, the goal is to fully enclose the raw edges within the seam allowance, providing a clean and durable finish. This differs from other seam finishes that might simply bind or zigzag the raw edge.
Step 2: First Seam Allowance
Now, sew a seam allowance of 1/4 inch (or 6mm) along the pinned edge. This initial seam is narrower than a typical seam allowance and serves as the foundation for encasing the raw edges. Use a straight stitch and maintain a consistent seam allowance throughout. Backstitch at the beginning and end of the seam to secure the stitches. After sewing, carefully remove the pins. This first seam isn’t meant to be the final seam; it’s a preparatory step. It creates a secure base for the subsequent trimming and folding process, ultimately hiding the fabric’s raw edges within the seam itself, offering a professional finish.
Step 3: Trimming the Seam Allowance
Following the first seam, carefully trim the seam allowance down to approximately 1/8 inch (or 3mm). Precision is key here; a neat trim ensures a clean finish. Use sharp fabric scissors for accurate cutting, avoiding any accidental snips into the stitching. This trimming step reduces bulk and prepares the fabric for the next crucial stage – encasing the raw edges. The goal is to create a slim profile that will be easily folded and concealed within the second seam. A close trim minimizes visible layers and contributes to the seam’s overall durability and refined appearance.
Step 4: Pressing the Seam
After trimming, gently press the seam open, ensuring the first seam allowance lies flat. This step is vital for creating a crisp, professional finish. Use an iron on the appropriate fabric setting, and consider using a pressing cloth to protect delicate materials. Pressing helps to set the stitches and prepares the fabric for the final encasing step. A well-pressed seam makes folding and stitching the second seam allowance much easier and more accurate. Take your time and ensure there are no wrinkles or creases, as these can affect the final appearance of the French seam.
Step 5: Encasing the Raw Edges
Now, fold the fabric with the wrong sides together, encasing the trimmed raw edges within the fold. The goal is to completely hide the initial seam allowance inside this new fold. Press this fold sharply to create a defined crease, making it easier to stitch accurately. Ensure the folded edge aligns neatly with the previous seam line. This step is the core of the French seam, providing a clean and durable finish. Precise folding and pressing are crucial for a professional-looking result, preventing any raw edges from being visible and minimizing fraying over time.
Step 6: Second Seam Allowance
Stitch a second seam allowance, this time slightly wider than the first – typically 3/8 inch or 1/2 inch. This second seam securely encloses the raw edges within the seam, creating a fully finished and incredibly durable seam. Backstitch at the beginning and end to secure the stitches. Press the completed French seam open or to one side, depending on your preference and the fabric weight. A well-executed second seam is vital; it’s what truly defines the French seam’s strength and prevents unraveling, offering a professional and long-lasting finish for your projects.
French Seam Variations
Explore techniques like narrow French seams for lightweight fabrics, adapting to curves, or combining with sergers for efficiency and unique seam finishes.
Narrow French Seam
A narrow French seam is a fantastic option when working with very lightweight or sheer fabrics where a bulky seam allowance would be noticeable. The process is similar to a standard French seam, but utilizes significantly smaller seam allowances – typically 1/8 inch or even less.
Begin by placing your fabric pieces wrong sides together and sewing with a very narrow seam allowance. Trim closely to the seam, then press the seam open. Fold the fabric with right sides together, encasing the raw edges within the fold, and stitch again using an even narrower seam allowance than the first. This creates a delicate, almost invisible seam that’s perfect for blouses, lingerie, or any project requiring a refined finish. Precision is key with narrow French seams, so take your time and use a consistent stitch length.
French Seam on Curved Edges
Applying a French seam to curved edges requires a bit more finesse than straight seams, but the result is a beautifully clean and professional finish. The key is to ease the fabric along the curve during both seam stages. Start by sewing the first seam allowance on the wrong side, slightly wider than usual to allow for manipulation.
Trim the seam allowance carefully, clipping into the curve to reduce bulk. Press the seam open, then fold the fabric right sides together, encasing the raw edges. Stitch the second seam allowance, carefully easing the fabric to match the curve. Shorten your stitch length for better control. A gentle, patient approach is crucial to avoid puckering or distortion. This technique is ideal for armholes, necklines, or any curved edge needing a refined finish.
Using a Serger with French Seams
Combining a serger with French seams offers a remarkably fast and clean finish, particularly for garments. Begin by serging the first seam allowance on the wrong side of the fabric, using a narrow overlock stitch. This encases the raw edge, providing a secure foundation. Then, fold the fabric right sides together, concealing the serged edge within the seam.
Stitch the second seam allowance with your sewing machine, ensuring it fully encloses the serged edge. The serger’s overlock stitch prevents fraying, while the second seam provides durability and a polished look. Adjust serger settings for a slightly narrower stitch width for optimal results. This method is excellent for lightweight fabrics and projects where speed and a professional finish are desired.
Troubleshooting Common Issues
Addressing challenges like uneven seams, fabric slippage, or bulkiness is key to mastering French seams; careful pressing and accurate stitching are vital.
Uneven Seams
Uneven French seams often stem from inconsistent seam allowances during both stages of construction. Maintaining a precise allowance – typically ¼ inch or ⅜ inch – is crucial. Use a seam guide or the markings on your sewing machine’s needle plate to ensure accuracy.
When trimming after the first seam, avoid removing too much fabric, as this can lead to puckering and unevenness in the final seam. Pressing each seam flat after stitching is also essential; this sets the stitches and helps to even out any minor discrepancies.
If you notice unevenness developing, carefully unpick the second seam allowance and re-stitch, paying close attention to maintaining a consistent seam allowance throughout the entire length of the fabric. Slow and steady wins the race!
Fabric Slippage
Fabric slippage during a French seam construction is common with slippery or loosely woven materials like silk, chiffon, or rayon. To combat this, consider using a walking foot on your sewing machine; it feeds both layers of fabric evenly, reducing shifting.
Reducing the presser foot pressure can also help, as excessive pressure can contribute to fabric movement. Stabilizing the fabric with pins placed perpendicular to the seam line is vital, ensuring they are close enough to provide support but not so close as to leave permanent marks.
A spray starch lightly applied to the fabric before cutting and sewing can add temporary body and reduce slippage. Test on a scrap first! Finally, sew slowly and deliberately.
Bulky Seams
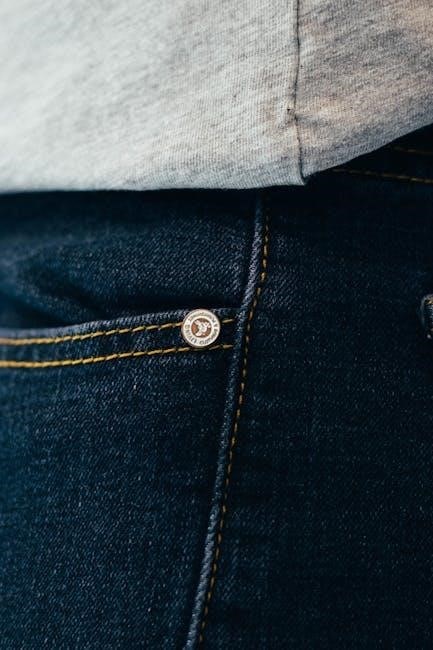
Bulky seams can occur when using French seams with thicker fabrics like denim or corduroy. To minimize bulk, carefully trim the first seam allowance as close to the stitching line as possible without cutting the stitches – precision is key! Pressing each seam allowance open after each step also helps reduce layers.
Consider using a slightly narrower seam allowance, perhaps 1/4 inch instead of 3/8 inch, if the fabric allows; Grading the seam allowance – trimming each layer to a different width – further reduces bulk. For very thick fabrics, a French seam might not be the best choice; explore alternative seam finishes.
A clapper can help create a sharp, flat seam when pressing.
Applications of French Seams
French seams excel in blouses, dresses, lingerie, and pillowcases, offering a professional finish and durability, especially with lightweight or delicate materials.
Garment Construction (Blouses, Dresses)
French seams are exceptionally well-suited for constructing garments like blouses and dresses, particularly those made from sheer or lightweight fabrics. Their enclosed raw edges prevent fraying and provide a clean, professional finish inside the garment, enhancing both its appearance and longevity.
Unlike standard seams, French seams add a touch of refinement, making them ideal for projects where the interior will be visible or where a high-quality finish is desired. They are particularly beneficial in areas prone to stress, such as armholes and side seams, offering increased durability. The technique minimizes bulk, creating a smooth silhouette, and is a fantastic choice for delicate materials that might easily unravel with other seam finishes.
Lingerie and Delicate Fabrics
French seams are the gold standard for lingerie and projects utilizing delicate fabrics like silk, chiffon, or lace. These materials are prone to fraying, and a French seam completely encloses the raw edges, preventing unraveling and ensuring a beautifully finished garment. The enclosed seam also provides added comfort, eliminating irritation against the skin.
Because lingerie often involves intricate designs and minimal layers, a clean, flat seam is crucial. French seams achieve this without adding unnecessary bulk, maintaining the delicate aesthetic. They are also incredibly durable, withstanding the frequent wear and washing that lingerie typically endures. This technique elevates the quality and longevity of these intimate apparel items.
Home Decor Projects (Pillowcases, Linens)
French seams bring a touch of sophistication and durability to home decor projects like pillowcases and linens. Unlike standard seams, they hide raw edges within the seam allowance, creating a clean and professional finish that’s visible even when items are closely inspected. This is particularly beneficial for items frequently handled and washed, like pillowcases.
For linens, the enclosed seam prevents fraying and extends the life of the fabric, resisting wear and tear over time. The technique also adds a subtle weight and luxurious feel. French seams are ideal for lightweight cottons, linens, and even more substantial fabrics used in curtains or duvet covers, offering both aesthetic appeal and lasting quality to your handmade home textiles.
Advanced French Seam Techniques
Explore combining French seams with bias tape for added durability and a refined look, or integrate them with other seam finishes for unique designs.
French Seam with Bias Tape
Enhance the strength and aesthetic of your French seams by incorporating bias tape. Begin by completing a standard French seam, encasing the raw edges as usual. Next, carefully apply bias tape over the completed seam allowance, effectively binding and reinforcing it. This technique is particularly useful for fabrics prone to stretching or those requiring extra durability, like lightweight silks or linens.
Choose a bias tape that complements your fabric in both color and material. Pin the bias tape securely, ensuring it fully encases the seam allowance. Stitch close to the edge of the bias tape, creating a neat and professional finish. This method not only adds a decorative element but also prevents fraying and provides a clean, polished look, ideal for garments and heirloom projects.
Combining French Seams with Other Seam Finishes
Expand your sewing toolkit by integrating French seams with complementary seam finishes. While French seams beautifully enclose raw edges, combining them with techniques like serging or zigzag stitching can add extra security, especially for high-stress areas. Consider serging the seam allowance before creating the French seam for enhanced edge protection.
Alternatively, after completing the French seam, a narrow zigzag stitch along the seam allowance can prevent fraying during frequent washing. For heavier fabrics, a flat-felled seam combined with a French seam offers exceptional durability and a professional appearance. Experimenting with these combinations allows you to tailor your seam finishes to the specific needs of your project, balancing aesthetics with functionality.
Resources for Further Learning
Dive deeper into French seam mastery with online tutorials and comprehensive sewing books; explore videos for visual guidance and detailed instructions.
Online Tutorials and Videos
Numerous platforms host excellent French seam tutorials, catering to all skill levels. YouTube is a fantastic resource, offering visual step-by-step guides from various sewing enthusiasts and professionals. Search terms like “French seam tutorial beginner” or “French seam tutorial cosplay” will yield relevant results.
Websites dedicated to sewing, such as those offering patterns or classes, frequently include detailed French seam demonstrations. These often provide accompanying written instructions and diagrams for clarity. Look for tutorials specifically addressing different fabric types, as the technique can be adapted. Many videos demonstrate the process slowly, allowing for easy comprehension and replication. Don’t hesitate to pause and rewind as needed to master each step!
Books on Sewing Techniques
Comprehensive sewing books remain invaluable resources for mastering techniques like the French seam. Look for titles focusing on garment construction or seam finishes, as these will dedicate chapters to detailed explanations and illustrations. Reader-friendly guides often break down complex processes into manageable steps, perfect for visual learners.
Classic sewing manuals frequently include sections on French seams, detailing their historical context and benefits. More modern publications may showcase variations and applications for contemporary projects. Consider books specializing in couture sewing, as French seams are a staple in high-end garment making. These resources provide a deeper understanding beyond quick tutorials, fostering a solid foundation in sewing principles.