
Seeking relief from scorching temperatures? Building a homemade air conditioner is surprisingly achievable, offering a cost-effective cooling solution for up to six hours!
Explore simple designs utilizing readily available materials like fans, buckets, and ice, documented extensively on platforms like Instructables․
Embrace energy consciousness and bypass expensive traditional units with these accessible, do-it-yourself cooling methods, perfect for beating the heat․
Why Build Your Own? (Cost Savings & Energy Consciousness)
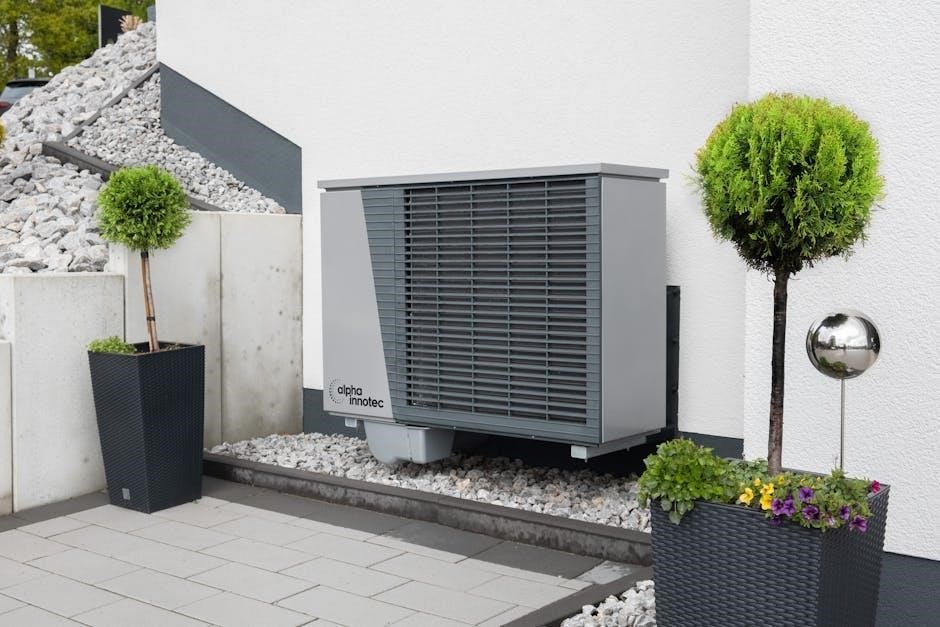
Traditional air conditioning can be a significant financial burden, both in initial purchase costs and ongoing electricity bills․ DIY alternatives offer substantial savings, often constructed for around $30, providing a budget-friendly cooling solution․
Beyond cost, building your own AC promotes energy consciousness․ With rising energy costs and environmental concerns, reducing reliance on power-hungry appliances is crucial․ These homemade systems, while less powerful, consume significantly less electricity․
Furthermore, DIY projects empower individuals to take control of their comfort without contributing to excessive energy demand, aligning with sustainable living practices․ It’s a practical response to heatwaves and a step towards responsible energy consumption․
Understanding the Basic Principle: Heat Exchange
At its core, air conditioning relies on heat exchange – the process of transferring thermal energy from one location to another․ DIY air conditioners mimic this principle, albeit on a smaller scale․ They don’t create cold air, but rather move heat․
Ice, or a frozen cooling agent, absorbs heat from the surrounding air as it melts․ A fan then circulates this cooled air, effectively lowering the temperature in a localized area․
This is a simplified version of the refrigeration cycle used in conventional AC units, but achieves a similar outcome through basic physics․ Effectively, you’re creating a localized cool zone by leveraging the heat absorption properties of ice and airflow․
Simple DIY Air Conditioner Designs
Discover accessible cooling solutions! From the basic ice and fan setup to enhanced bucket and styrofoam cooler methods, build relief easily․
These designs offer a practical, budget-friendly alternative to traditional air conditioning, perfect for personal cooling․
The Ice and Fan Method: A Beginner’s Approach
This is the simplest DIY air conditioner, ideal for those new to home cooling projects․ It requires minimal materials: a fan and a container filled with ice․
Position the ice container directly in front of the fan․ As the fan blows air across the ice, it cools down, creating a refreshing breeze․
For extended cooling, use frozen water bottles instead of loose ice – they melt slower․ Regularly replace the ice or bottles as they thaw to maintain effectiveness․
While basic, this method provides noticeable relief in small spaces and is a fantastic starting point for exploring more advanced DIY cooling options․
Bucket Air Conditioner: Utilizing Ice and a Small Fan
The bucket air conditioner enhances the ice and fan method by containing the melting ice and directing airflow․ You’ll need a bucket, a small fan, and, of course, ice!
Cut holes in the bucket lid – one for the fan to sit securely and others for air to escape․ Position the fan to blow down into the ice-filled bucket․
The air is cooled as it passes over the ice and exits through the vent holes, creating a localized cooling effect․ Consider adding insulation around the bucket for better performance․
This design is portable and offers a more focused cooling stream than the basic ice and fan setup, making it ideal for personal use;
Styrofoam Cooler Air Conditioner: Enhanced Cooling
The styrofoam cooler air conditioner builds upon the bucket design, leveraging the superior insulation of a cooler for extended cooling duration․ This method significantly improves ice retention․
Cut holes in the cooler lid, similar to the bucket method – one for the fan and several for airflow․ Ensure a snug fit for the fan to maximize efficiency․
The cooler’s insulation slows ice melting, providing longer-lasting cool air․ Strategically placed vents direct the chilled air outwards, creating a more substantial cooling zone․
This design is ideal for small rooms or personal spaces, offering a noticeable temperature reduction compared to simpler DIY options․
Materials Needed for Construction
Essential supplies include a fan, bucket or cooler, ice (or frozen water bottles), cutting tools, and optionally, a drill for precise vent creation․
Gather these readily available items to embark on your DIY air conditioning project and conquer the summer heat effectively!
Essential Components: Fans, Buckets, Coolers
Fans are crucial for circulating the cooled air, with box fans or smaller portable fans being ideal choices․ Buckets or coolers serve as the housing for your cooling agent – ice – and direct airflow․ A standard five-gallon bucket works well, but a styrofoam cooler offers superior insulation․
Consider fan size relative to the container; a larger fan moves more air, but requires a bigger opening․ Cooler selection impacts cooling duration; thicker walls retain cold longer; Ensure the bucket or cooler is clean and structurally sound to prevent leaks or instability during operation․ These components form the foundation of your DIY cooling system․
Cooling Agents: Ice, Frozen Water Bottles
Ice is the primary cooling agent, absorbing heat as it melts, lowering the air temperature․ Frozen water bottles offer a convenient, leak-proof alternative, extending cooling duration compared to loose ice․ Consider using multiple bottles for sustained coolness․
Ice quantity impacts performance; more ice means longer cooling, but also increased condensation․ Rotating frozen bottles ensures continuous cooling as they thaw․ Experiment with different ice forms – cubes, crushed ice, or blocks – to optimize cooling efficiency․ Remember to manage condensation to prevent water damage․
Tools Required: Cutting Tools, Drill (Optional)
Essential tools include cutting implements – a utility knife or scissors – for modifying plastic containers like buckets or coolers․ A drill is optional, primarily needed for creating ventilation holes for optimal airflow․ Safety glasses are crucial when using cutting or drilling tools․
Consider a hole saw attachment for cleaner, more precise holes if using a drill․ Measuring tools, like a ruler or tape measure, aid in accurate modifications․ Always prioritize safety and use appropriate protective gear during construction․ Simple designs may require minimal tooling․

Step-by-Step Construction Guides
Detailed walkthroughs are readily available for building bucket and styrofoam cooler air conditioners, alongside quick guides for the simple ice and fan method!
Instructables provides visual aids and clear instructions, empowering you to create a cooling solution tailored to your needs and skill level․
Building the Bucket Air Conditioner: A Detailed Walkthrough
Begin with a 5-gallon bucket and carefully cut holes in the lid – one for a small fan and several around the sides for airflow․ Securely mount the fan over its designated hole, ensuring it blows air into the bucket․
Next, add your cooling agent: ice, frozen water bottles, or a combination of both․ The more ice, the longer the cooling duration․ Position the ice strategically to maximize airflow contact․
Finally, place the bucket in a well-ventilated area and power on the fan․ The fan draws air through the ice, creating a localized cooling effect․ Remember to periodically replenish the ice as it melts for sustained coolness!
Consider adding insulation around the bucket for improved efficiency․
Constructing the Styrofoam Cooler Version: Step-by-Step
Start with a styrofoam cooler and cut two holes in the lid – one for a small fan and another for air exhaust․ The fan should be positioned to blow air into the cooler’s interior․
Securely mount the fan over its opening, ensuring a tight seal to prevent air leakage․ Inside, place your chosen cooling agent: ice or frozen water bottles, maximizing surface area exposure․
The cooler’s insulation significantly enhances cooling duration compared to a bucket․ Position the cooler strategically and power on the fan․ Monitor and replenish the ice as needed․
For optimal performance, seal any gaps around the fan and lid to maintain internal cold air․
Assembling the Ice and Fan Method: Quick and Easy
This is the simplest approach: position a bowl or container filled with ice directly in front of a fan․ The fan’s airflow passes over the ice, creating a localized cooling effect․
For increased effectiveness, elevate the ice container to align with the fan’s strongest airflow․ Regularly replenish the ice as it melts to maintain consistent cooling․
Consider using frozen water bottles instead of loose ice; they melt slower and are less messy․ Direct the airflow towards yourself for immediate relief․
While basic, this method provides instant, albeit temporary, cooling, ideal for small spaces or personal comfort․

Optimizing Performance & Cooling Duration
Maximize cooling! Utilize insulation around your DIY unit, strategically position the fan for airflow, and consistently refresh the ice for prolonged, efficient cooling․
Maximizing Ice Life: Tips and Tricks
Extending the cooling duration of your DIY air conditioner hinges on preserving the ice for as long as possible․ Consider utilizing frozen water bottles instead of loose ice; they melt slower, reducing the need for frequent replacements․
Insulation is key! Surrounding the ice container with insulating materials – like towels, blankets, or even more styrofoam – significantly slows down the melting process․
Pre-chill everything․ Before assembly, chill the water you intend to freeze, and even pre-cool the container holding the ice․ This minimizes initial temperature differences and extends ice life․
Avoid direct sunlight and ensure the unit is in a shaded area to prevent accelerated melting․
Fan Placement for Efficient Airflow
Optimizing airflow is crucial for maximizing the cooling effect of your DIY air conditioner․ Position the fan to directly blow air across the surface of the ice, not directly at it․ This allows for greater heat exchange and cooler air distribution․
Consider the angle – a slight upward tilt can help circulate the cooled air more effectively throughout the room․
Minimize obstructions around the fan and ice source to ensure unimpeded airflow․
Experiment with distance; finding the sweet spot between fan proximity and ice coverage will yield the best results․
Insulation Techniques for Improved Cooling
Enhance your DIY air conditioner’s performance by minimizing heat gain․ Insulating the container holding the ice significantly slows melting, extending cooling duration․
Utilize readily available materials like bubble wrap, foam padding, or even old blankets to wrap around the bucket or cooler․
Pay attention to the lid – a well-insulated lid is paramount, preventing warm air from entering and melting the ice․
Seal any gaps or cracks with tape to create a more airtight enclosure, further improving insulation effectiveness and maximizing cooling time․
Safety Precautions
Prioritize safety! Keep electricity and water separate to avoid hazards․ Ensure proper ventilation, and always unplug fans before handling water or ice․
Exercise caution when using cutting tools and follow all electrical safety guidelines during construction․
Electrical Safety with Fans
Working with electricity demands respect․ Always ensure the fan is unplugged from the power source before any assembly, disassembly, or cleaning․ Inspect the fan’s power cord for any damage – fraying, cracks, or exposed wires – and do not use it if compromised․
Avoid operating fans in damp or wet environments; water and electricity are a dangerous combination․ If the fan housing gets wet, immediately disconnect it and allow it to dry completely before reuse․ Consider using a Ground Fault Circuit Interrupter (GFCI) outlet for added protection, especially in potentially damp areas․
Never modify the fan’s electrical components or attempt repairs unless you are a qualified electrician․
Water and Electricity: Avoiding Hazards
Combining water and electricity is extremely dangerous․ DIY air conditioners inherently involve both, demanding utmost caution․ Ensure no electrical components come into direct contact with water from melting ice or condensation․ Position the fan and electrical connections well above the water level within the cooler or bucket․
Prevent water spillage by carefully managing ice placement and avoiding overfilling․ Regularly check for leaks and promptly address any moisture accumulation around electrical parts․
Never submerge the fan or any electrical components in water․ Prioritize dry hands when handling electrical connections near water sources․
Proper Ventilation Considerations
DIY air conditioners cool localized areas, not entire rooms․ Adequate ventilation is crucial to prevent humidity buildup and ensure effective cooling․ Confining cooled air in a sealed space diminishes its impact and can lead to discomfort․
Maintain airflow by opening windows or doors slightly to allow warm air to escape and fresh air to circulate․ This prevents the room from becoming overly saturated with moisture․
Avoid directing the cool air into a completely closed room; instead, create a pathway for air exchange to maximize the cooling effect and maintain comfortable humidity levels․
Limitations and Expectations
DIY air conditioners offer modest cooling, unlike traditional units․ Expect localized relief for several hours, influenced by ice quantity and ambient temperature․
Performance varies greatly; these are supplemental solutions, not replacements for central air, providing a temporary respite from the heat․
Cooling Capacity: Realistic Expectations
Understanding the limitations is crucial․ These DIY air conditioners aren’t designed to cool an entire house like a conventional system․ Instead, they provide localized cooling, best suited for a small space or personal comfort zone․
Don’t anticipate a dramatic temperature drop․ The cooling effect is dependent on factors like ice volume, ambient temperature, and insulation․ Expect a noticeable, but moderate, reduction in heat – perhaps 10-15 degrees Fahrenheit in the immediate vicinity․
Consider it a personal cooling solution, ideal for directing airflow towards yourself while working or sleeping․ It’s a temporary fix, offering relief rather than a complete climate control solution․
Duration of Cooling: Factors Affecting Performance
Cooling duration varies significantly․ Reports suggest up to 6 hours of coolness, but this is highly dependent on several key factors․ The amount of ice used is paramount; more ice equals longer cooling․ Ambient temperature plays a role – hotter days require more ice to maintain the effect․
Insulation is critical․ A well-insulated cooler or bucket slows ice melt, extending cooling time․ Airflow also impacts performance; a stronger fan circulates cooler air, but can accelerate ice melting․
Regular ice replenishment is essential for sustained cooling․ Consider freezing water in bottles for a slower, more consistent release of cold․
Comparison to Traditional Air Conditioners
DIY air conditioners offer a significantly lower cost alternative to traditional units, requiring only around $30 in materials․ However, their cooling capacity is substantially less․ They are best suited for cooling a small, localized area – a personal space rather than an entire room․
Traditional ACs provide consistent, powerful cooling and humidity control, features absent in DIY versions․ Energy consumption is also a key difference; DIY units use minimal electricity, primarily for the fan․
Consider DIY solutions as supplemental cooling, ideal for short-term relief or in situations where traditional AC isn’t feasible․

Resources and Further Information
Dive deeper into DIY cooling! Explore detailed guides and user-created projects on Instructables, and connect with fellow enthusiasts in online communities and forums․
Troubleshooting tips and solutions to common issues are readily available online, ensuring a successful build and optimal performance․
Instructables as a Source for DIY Projects
Instructables stands as a premier online destination for all things DIY, and homemade air conditioners are prominently featured within its vast project library․ Numerous users, like CameronSS, have meticulously documented their builds, offering step-by-step instructions, material lists, and helpful photos․
This platform fosters a collaborative environment where builders share modifications, troubleshooting advice, and performance enhancements․ You’ll find diverse designs, ranging from simple ice-and-fan setups to more elaborate cooler-based systems․
Instructables provides a wealth of knowledge, empowering individuals to confidently tackle these projects and customize them to their specific needs and available resources․ It’s a fantastic starting point for beginners!
Online Communities and Forums
Beyond Instructables, a vibrant network of online communities and forums provides invaluable support for DIY air conditioner builders․ These platforms serve as hubs for sharing experiences, seeking advice, and troubleshooting challenges encountered during construction and operation․
Engage with fellow enthusiasts to discuss optimal cooling agents, fan placement strategies, and insulation techniques․ Many forums host dedicated threads specifically addressing homemade AC projects, fostering a collaborative learning environment․
These communities offer a space to refine designs, discover innovative solutions, and connect with individuals passionate about energy-conscious cooling alternatives․
Troubleshooting Common Issues
Encountering problems with your DIY air conditioner? Reduced cooling performance is often linked to insufficient ice or improper insulation․ Regularly replenish ice and ensure a tight seal around the cooling source․
If airflow is weak, check the fan’s power supply and ensure it’s unobstructed․ Condensation buildup can also hinder performance; consider adding drainage holes or utilizing a dehumidifying agent․
Online forums are excellent resources for diagnosing specific issues․ Many builders report challenges with ice melting rates; experimenting with frozen water bottles can extend cooling duration․