Cuisinart Ice Cream Maker Instruction Manual: A Comprehensive Guide
Discover the joy of homemade ice cream! This manual details Cuisinart’s range, from Freeze Ease to FastFreeze, ensuring delightful frozen treats effortlessly.
Welcome to the world of effortless frozen dessert creation! Cuisinart ice cream makers empower you to craft delicious, customized treats right in your kitchen. From classic flavors to innovative combinations, the possibilities are endless. Cuisinart offers a diverse lineup, including models like the Freeze Ease, known for its no-pre-freeze technology, and the convenient Freeze Wand, perfect for quick batches.
The recently launched FastFreeze model further expands the options, coinciding with celebrations like National Ice Cream Day. These machines aren’t just appliances; they’re gateways to a summer filled with homemade goodness, offering a superior alternative to store-bought options;
Understanding Different Cuisinart Models
Cuisinart caters to diverse needs with its range of ice cream makers. The Freeze Ease, priced around $149;99 ─ $349.99, boasts no-pre-freeze technology for ultimate convenience. The Freeze Wand, at $99.99, offers a simple, push-button operation, capable of making up to three servings.
For those seeking speed, the FastFreeze model is a recent addition, designed for quick and efficient ice cream production. Each model balances features with price, considering kitchen space and desired output. Some require extra chilling for firmer results, while others prioritize ease of use.
Cuisinart Freeze Ease Ice Cream Maker
The Cuisinart Freeze Ease distinguishes itself with its innovative no-pre-freeze technology, eliminating the need for lengthy bowl freezing. Priced between $149.99 and $349.99, it offers a range of programs for various frozen desserts. This model is ideal for spontaneous ice cream cravings, delivering consistent results without extensive preparation.

Its user-friendly design and multiple program options make it a versatile addition to any kitchen. Enjoy effortless ice cream creation, simplifying the process and maximizing enjoyment.
Cuisinart Freeze Wand Ice Cream Maker
The Cuisinart Freeze Wand offers a uniquely simple approach to homemade ice cream. Priced at $99.99, this model utilizes a manual churning process – simply push the wand to create delicious frozen treats. It’s capable of making up to three ice creams with a single push, making it perfect for small batches or varied flavors.
Its compact design and ease of use make it a convenient option for those seeking a straightforward, non-electric ice cream making experience. Enjoy fresh ice cream without the fuss!
Cuisinart FastFreeze Ice Cream Maker
Celebrate National Ice Cream Day with the Cuisinart FastFreeze Ice Cream Maker! This new release is designed for quick and efficient ice cream creation. It’s a fantastic option for those who want to enjoy homemade ice cream without a lengthy wait. The FastFreeze model is readily available for purchase, allowing you to start crafting your own frozen delights immediately.
Details regarding specific features and pricing are emerging, promising a delightful experience for ice cream enthusiasts. Get ready to melt into deliciousness!

Preparing for Your First Use
Before your inaugural batch of homemade ice cream, proper preparation is key. Begin by thoroughly familiarizing yourself with all components of your Cuisinart ice cream maker. A careful initial cleaning is essential to remove any manufacturing residue, ensuring a pure and flavorful final product.
Inspect all parts for any damage sustained during shipping. Understanding each part’s function will streamline the ice cream-making process, leading to a smoother and more enjoyable experience. Get ready to create!
Initial Cleaning and Component Check
Prior to first use, meticulously wash the freezer bowl, dasher, and any other removable parts with warm, soapy water. Rinse thoroughly and dry completely. Inspect the freezer bowl for any cracks or imperfections – crucial for optimal freezing.
Verify all components are present, referencing the parts diagram in this manual. Ensure the motor base is clean and dry. A thorough check now prevents issues later. Confirm proper functionality of all parts before proceeding to the ice cream-making process.
Understanding the Parts of Your Cuisinart Ice Cream Maker
Your Cuisinart ice cream maker consists of several key components. The freezer bowl, requiring pre-freezing (except for models with no-pre-freeze technology), holds the ice cream mixture. The dasher, with its unique paddle design, churns and aerates the mixture.
The motor base houses the mechanism that drives the dasher. A lid with an opening for adding mix-ins is also included. Familiarize yourself with each part’s function; proper assembly is vital for successful ice cream creation. Refer to the diagrams for correct placement.
Basic Ice Cream Making Process
Creating homemade ice cream with your Cuisinart is a rewarding experience. It begins with selecting high-quality ingredients for your desired recipe – cream, milk, sugar, and flavorings are essential. Proper ingredient proportions are crucial for texture.
Next, thoroughly chill your ice cream base before churning. Assembling the machine involves securely attaching the dasher to the freezer bowl and placing it onto the motor base. The churning process transforms the liquid mixture into a delightful frozen dessert, ready for enjoying!
Ingredient Selection and Recipes
The foundation of exceptional ice cream lies in ingredient quality. Full-fat dairy – cream and milk – provides richness; Sugar balances sweetness and affects texture; granulated, caster, or even alternative sweeteners work. Flavorings are limitless: vanilla extract, cocoa powder, fresh fruits, or even spices.
Cuisinart machines excel with classic recipes like vanilla and chocolate, but encourage experimentation! Ensure recipes are specifically designed for ice cream makers, considering freezing points and ingredient ratios. Pre-chilling the base is vital for optimal results and a smoother consistency.
Assembling the Ice Cream Maker
Proper assembly is crucial for efficient operation. Begin by ensuring the freezer bowl is thoroughly frozen – typically 16-24 hours. Securely attach the dasher assembly to the motor unit, aligning the components correctly. Carefully place the frozen bowl within the machine’s housing, ensuring a snug fit.
Double-check all connections before pouring in your ice cream base. The dasher should rotate freely without obstruction. Refer to your specific model’s diagram for precise component placement. Incorrect assembly can lead to malfunctions or uneven freezing.
Operating Instructions
Before starting, confirm the freezer bowl is completely frozen and properly installed. Plug the ice cream maker into a grounded outlet. Power on the device and select the appropriate setting – often a simple ‘on’ position for basic models, or program options for advanced units like the FastFreeze.
Pour your prepared ice cream mixture into the frozen bowl. Initiate the churning process; the dasher will begin to rotate. Monitor the mixture’s consistency as it transforms into ice cream, typically within 20-30 minutes.
Powering On and Selecting Settings
To begin, ensure the ice cream maker is placed on a stable, level surface. Connect the power cord to a grounded electrical outlet. Most Cuisinart models feature a straightforward power button to initiate operation. Advanced models, like the FastFreeze, may offer pre-programmed settings for different ice cream types – sorbet, gelato, or standard ice cream.
Select your desired setting, if applicable, before adding the ice cream mixture. Some units have speed controls; generally, a lower speed is suitable for initial mixing, increasing as it thickens.
The Churning Process – Step-by-Step
Once powered on, carefully pour your prepared ice cream mixture into the frozen bowl. Secure the lid and activate the churning mechanism. The machine will begin to rotate, gradually freezing and aerating the mixture. Allow the unit to run for approximately 20-30 minutes, or until the ice cream reaches your desired consistency.
The Freeze Wand model utilizes a single push to initiate churning, while others operate continuously. Monitor the process; the mixture will thicken and expand as it freezes. Avoid overfilling the bowl for optimal results.
No-Pre-Freeze Technology Explained
Certain Cuisinart models, like the Freeze Ease, boast innovative no-pre-freeze technology. This eliminates the need to pre-freeze the bowl for hours, saving valuable time and freezer space. Instead, a powerful compressor chills the mixture directly during the churning process.
This feature allows for spontaneous ice cream creation whenever the craving strikes! The machine efficiently lowers the temperature, ensuring a smooth and creamy texture without prior preparation. It’s a convenient solution for instant frozen dessert enjoyment.
Adding Mix-Ins During Churning
Enhance your creations by incorporating mix-ins during the final few minutes of the churning cycle. This prevents them from sinking to the bottom and ensures even distribution throughout your ice cream. Popular choices include chocolate chips, nuts, fruit pieces, or cookie crumbles.
Slowly pour the mix-ins through the ingredient spout while the machine is running. Avoid adding too much at once, as this could overload the motor. The consistency should remain manageable for optimal blending and a delightful texture.
Achieving Desired Ice Cream Consistency
Tailor your treat! The churning time significantly impacts the final consistency. For soft-serve, a shorter churning duration is ideal – typically around 20-30 minutes. However, for a firmer, scoopable ice cream, continue churning for an additional 10-15 minutes, or until it reaches your preferred thickness.
If the mixture appears too soft, transfer it to a freezer-safe container and freeze for 2-4 hours to firm up. Conversely, if it’s too hard, let it sit at room temperature for a few minutes before scooping.
Troubleshooting Soft Serve Issues
Experiencing a too-soft consistency? Ensure your ingredients are thoroughly chilled before churning – this is crucial. Verify the freezer bowl is completely frozen, especially with models requiring pre-freezing. If using the no-pre-freeze technology, confirm sufficient chilling time has elapsed.
Insufficient churning time can also result in a soft texture. Extend the churning process in 5-minute increments, checking consistency after each interval. A warmer ambient temperature might also affect firmness; consider reducing room temperature if possible.

Troubleshooting Firm Ice Cream Issues
If your ice cream is excessively firm, it likely indicates over-churning or insufficient liquid in your recipe. Reduce the churning time in future batches, monitoring closely for desired consistency. Adding a tablespoon or two of alcohol (like vodka) can help prevent excessive freezing, though use sparingly.
Ensure the freezer bowl isn’t too cold; some models benefit from a brief warming period before serving. If the mixture froze during the initial chilling stage, it may result in a dense, hard final product.
Cleaning and Maintenance
Maintaining your Cuisinart ice cream maker is crucial for longevity and hygiene. Always unplug the unit before cleaning. Disassemble components – bowl, dasher, lid – and wash in warm, soapy water. Avoid abrasive cleaners which can damage surfaces.
The freezer bowl requires careful handling; hand-wash only. Ensure all parts are thoroughly dried before reassembly. Proper storage involves a cool, dry place, preventing mildew or odors. Regular cleaning prevents bacterial growth and ensures optimal performance for future batches.
Disassembling for Cleaning
Before cleaning, disconnect your Cuisinart ice cream maker. Gently remove the freezer bowl – avoid forceful twisting. Detach the dasher assembly by lifting upwards; some models may require a slight rotation. The lid and any included measuring cups or ingredient chutes can then be removed easily.
Refer to your specific model’s diagram for precise disassembly instructions. Keep track of all parts to ensure proper reassembly. Inspect each component for any remaining ice cream residue before washing. Careful disassembly simplifies the cleaning process significantly.
Proper Storage Techniques
Ensure all components are completely dry before storing your Cuisinart ice cream maker. The freezer bowl must be thoroughly dried to prevent ice crystal formation. Store the bowl upright to maintain its shape. Keep the dasher, lid, and other detachable parts in a clean, dry location, ideally in the original packaging.
Avoid stacking heavy items on top of the freezer bowl. Proper storage prevents damage and ensures your ice cream maker is ready for its next delicious creation. A cool, dry pantry is ideal.
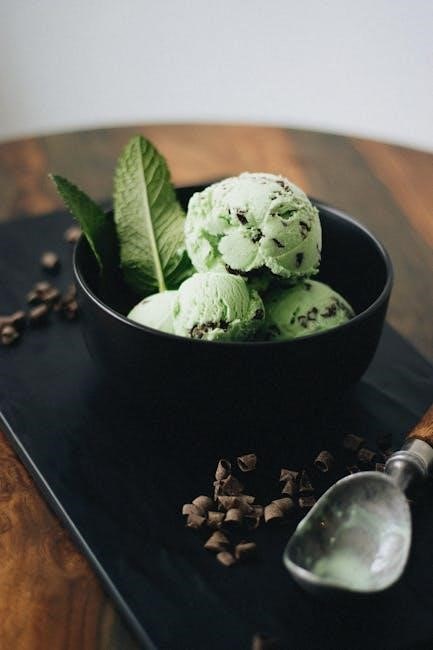
Recipe Ideas and Inspiration
Unleash your inner pastry chef with Cuisinart! Beyond basic flavors, explore endless possibilities. Start with a Classic Vanilla Ice Cream Recipe – a perfect base for mix-ins. Then, dive into a rich Chocolate Ice Cream Recipe for a decadent treat.
Experiment with fruit purees, cookie pieces, or even swirls of caramel. Don’t be afraid to get creative! National Ice Cream Day (July 20th) is a great excuse to try new recipes and share your creations with friends and family.
Classic Vanilla Ice Cream Recipe

Ingredients: 2 cups heavy cream, 1 cup whole milk, ¾ cup sugar, 1 vanilla bean (split and scraped), pinch of salt.
Instructions: Combine all ingredients in a saucepan and heat gently until sugar dissolves. Cool completely, then chill for at least 4 hours. Pour into your Cuisinart ice cream maker and churn according to your model’s instructions. This recipe provides a perfect, creamy base for adding your favorite mix-ins, creating a truly personalized dessert experience. Enjoy this timeless classic!
Chocolate Ice Cream Recipe
Ingredients: 2 cups heavy cream, 1 cup whole milk, ¾ cup sugar, ¾ cup unsweetened cocoa powder, ¼ teaspoon salt, 1 teaspoon vanilla extract.
Instructions: Whisk together sugar and cocoa powder. Gradually add milk and cream, stirring until smooth. Heat gently until sugar is dissolved, but do not boil. Stir in salt and vanilla. Chill thoroughly for at least 4 hours. Process in your Cuisinart ice cream maker following the specific guidelines for your model. This rich, decadent treat is sure to satisfy any chocolate craving!
Safety Precautions

Always unplug the ice cream maker before cleaning or disassembling. Never immerse the motor housing in water or other liquids. Keep the power cord away from hot surfaces. Do not operate the appliance if the cord or plug is damaged. Children should be supervised to ensure they do not play with the appliance; Avoid operating the ice cream maker continuously for extended periods; allow it to cool down between batches. Ensure all parts are properly assembled before operation to prevent accidents.
Warranty Information
Cuisinart stands behind its ice cream makers with a limited warranty against defects in materials and workmanship. This warranty typically covers one year from the date of original purchase. To obtain warranty service, contact Cuisinart customer support with proof of purchase. The warranty does not cover damage caused by misuse, accidents, or unauthorized repairs. Registering your appliance enhances customer service. See included documentation for complete warranty details and exclusions. Retain your purchase receipt for warranty claims.
Registering Your Cuisinart Ice Cream Maker
Registering your new Cuisinart ice cream maker provides several benefits, including streamlined warranty service and access to exclusive promotions. Registration confirms your ownership and allows Cuisinart to contact you with important product updates or recall notices. You can typically register online through the Cuisinart website, using your model number and purchase date. Keep your proof of purchase handy during the registration process. This simple step ensures a smoother experience should you ever need assistance with your appliance.
Frequently Asked Questions (FAQ)
Q: Does my Cuisinart ice cream maker require pre-freezing? Some models, like the Freeze Ease and FastFreeze, boast no-pre-freeze technology. Others, such as the Freeze Wand, may benefit from chilling the bowl beforehand for firmer results. Q: How long does churning take? Typically, 20-30 minutes is sufficient, but consistency varies. Q: Can I make sorbet or frozen yogurt? Absolutely! Adjust recipes accordingly. Q: What if my ice cream is too soft? Ensure proper chilling and consider a longer churning time.