Appleton Spiral Ham Cooking Instructions: A Comprehensive Guide
Welcome! This guide delivers everything you need for a perfectly cooked, flavorful Appleton spiral ham, ensuring a delightful centerpiece for any occasion.
Understanding Your Appleton Spiral Ham
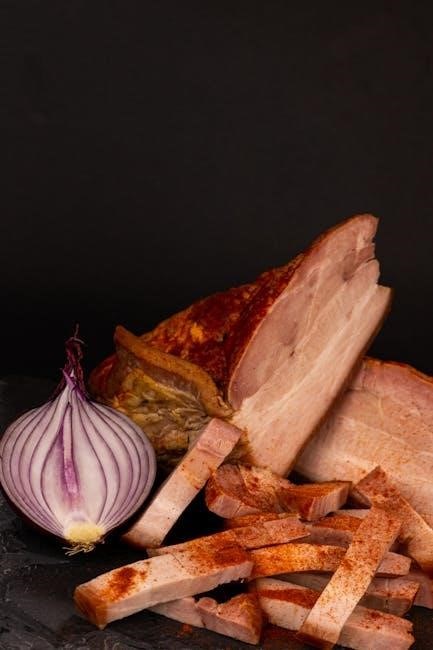
Appleton spiral hams are fully cooked, meaning they require reheating, not traditional cooking. This pre-cooked nature significantly reduces cooking time and simplifies meal preparation. The spiral slicing allows for even heat penetration and easy serving, as individual portions can be effortlessly pulled away.
These hams are typically cured, smoked, and then glazed during processing, contributing to their distinctive sweet and savory flavor profile. Understanding this pre-cooked status is crucial; you’re aiming to warm the ham to a safe internal temperature and enhance its existing flavors, rather than cooking it from raw. Pay attention to the packaging for specific details about your ham’s preparation.
Types of Appleton Spiral Hams
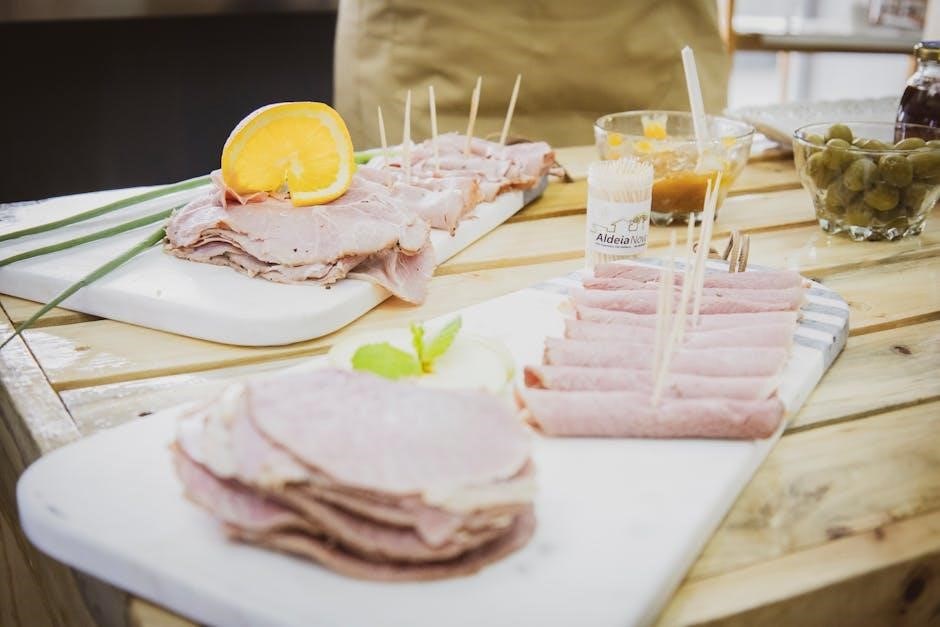
Appleton offers a variety of spiral ham options to suit different preferences and needs. You’ll commonly find options like the “Honey Glazed” spiral ham, known for its classic sweet flavor, and the “Brown Sugar” variety, offering a richer, caramelized taste. They also produce “Smoked” spiral hams for a more pronounced smoky flavor profile.
Beyond these core types, seasonal or limited-edition flavors may be available. Some hams include a separate packet of glaze for application during the final stages of reheating. Consider the size of your gathering when choosing; hams range considerably in weight. Checking the packaging will clearly indicate the specific flavor and any included glaze packets.
Ham Weight & Serving Size Estimation
Accurate estimation is key to avoiding waste and ensuring everyone enjoys the meal. A general rule of thumb is to plan for approximately 3-4 ounces of bone-in spiral ham per person. For a boneless ham, increase this to 4-5 ounces per guest.
A 7-9 pound ham typically serves 14-18 people, while a 9-11 pound ham comfortably feeds 18-22. Larger gatherings of 22+ will require a ham weighing 11-14 pounds or more. Remember these are estimates; generous eaters or those who enjoy leftovers may warrant increasing the amount. Always err on the side of slightly more!
Preparing for Cooking
Before you begin, remove the ham from its packaging and discard any included glaze packets if you plan to create your own (we highly recommend it!). Gently rinse the ham under cool water and pat it completely dry with paper towels. This helps the glaze adhere better.
Inspect the ham for any plastic or metal ties; remove these before cooking. Place the ham on a large roasting rack set inside a roasting pan. Adding about a cup of water to the bottom of the pan helps maintain moisture during cooking, preventing the ham from drying out.
Thawing Your Spiral Ham (If Frozen)
Proper thawing is crucial for even cooking and food safety. The safest method is refrigerator thawing. Allow approximately 4-6 hours of thawing time for every pound of ham. A 7-10 pound ham will require a full 24-30 hours in the refrigerator.
Ensure the ham remains in its original packaging during thawing and place it on a tray to catch any drips. Never thaw ham at room temperature, as this encourages bacterial growth. If you’re short on time, you can submerge the sealed ham in cold water, changing the water every 30 minutes, allowing about 30 minutes per pound.
Essential Tools & Equipment
Preparing your Appleton spiral ham requires minimal specialized equipment, making it accessible for all cooks. You’ll need a large roasting pan – one that comfortably fits your ham with some space around it. A roasting rack is highly recommended; it elevates the ham, allowing for even heat circulation.
A meat thermometer is absolutely essential for ensuring the ham reaches a safe internal temperature. Aluminum foil is needed for covering during the initial cooking phase. Finally, have a basting brush ready for glaze application. These simple tools will guarantee a successful and delicious outcome!
Checking Internal Temperature – Why It Matters
Ensuring your Appleton spiral ham reaches a safe internal temperature isn’t just a recommendation – it’s crucial for food safety! Spiral hams are pre-cooked, so you aren’t aiming for a specific “done” temperature, but rather a reheating temperature.
The USDA recommends reheating to an internal temperature of 140°F (60°C). Insert your meat thermometer into the thickest part of the ham, avoiding the bone. Accurate temperature monitoring prevents potential foodborne illnesses and guarantees a juicy, flavorful result. Don’t rely on visual cues alone; a thermometer is your best friend!
Cooking Methods: Oven is Key
While alternative methods like slow cooking or grilling can be attempted with an Appleton spiral ham, the oven consistently delivers the most reliable and evenly heated results. The oven’s consistent heat allows for gentle reheating, preserving the ham’s natural moisture and enhancing its delicious flavor.
Other methods often struggle to heat the ham thoroughly without drying it out. We’ll focus primarily on oven cooking, providing detailed instructions and a temperature/time chart for optimal success. Consider the oven the gold standard for preparing your Appleton spiral ham!
Oven Cooking: The Standard Approach
The standard approach to cooking an Appleton spiral ham involves gentle reheating in the oven, allowing the flavors to meld and the ham to become wonderfully warm. This method prioritizes maintaining moisture, crucial for a tender and juicy final product. Begin by placing the ham cut-side down on a rack within a roasting pan.
Adding about a half-cup of water or broth to the bottom of the pan helps create steam, further preventing dryness. Cover the ham initially with foil, then uncover it during the glazing phase for beautiful browning.
Oven Temperature & Cooking Time Chart (Based on Weight)
Here’s a guide to oven temperature and cooking time, crucial for a perfectly heated Appleton spiral ham. Maintain a consistent 325°F (163°C) throughout the process.
- 6-8 lb Ham: 10-12 minutes per pound;
- 8-10 lb Ham: 10-12 minutes per pound.
- 10-14 lb Ham: 12-15 minutes per pound.
- 14-20 lb Ham: 15-18 minutes per pound.
These times are estimates; always verify the internal temperature reaches 140°F (60°C). Remember to account for any pre-glazing covered cooking time when calculating total heating duration. Adjust slightly based on your oven’s calibration.
Glazing Options: Classic & Creative
Elevate your Appleton spiral ham with a delightful glaze! While the ham is pre-seasoned, a glaze adds a beautiful sheen and complementary flavor. Classic choices include brown sugar and honey, offering a sweet and savory profile.
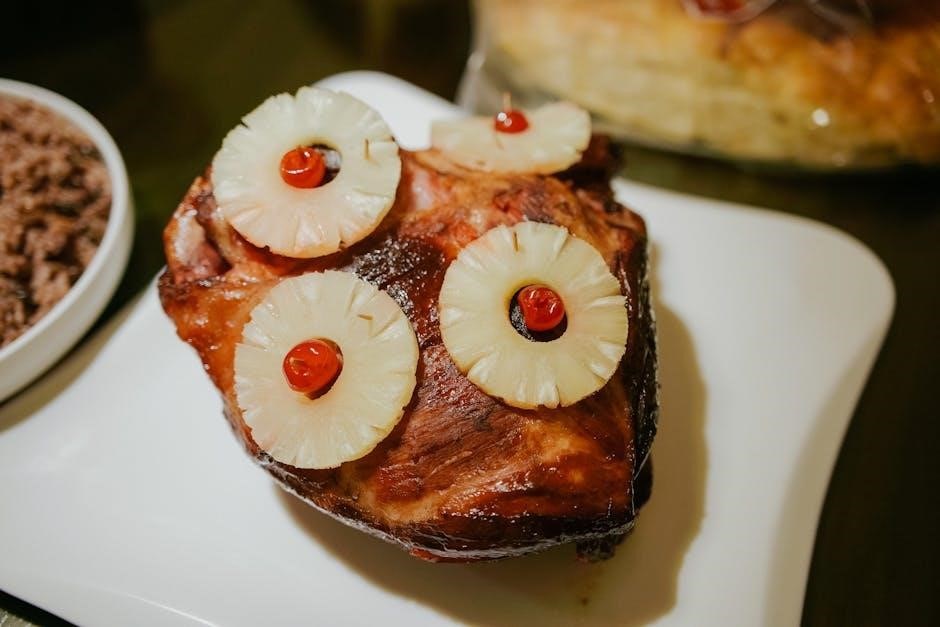
For a fruity twist, consider pineapple and cherry glazes, balancing sweetness with tartness. Maple and mustard provide a sophisticated, slightly tangy experience. Don’t be afraid to experiment! A touch of spice, like cinnamon or cloves, can also enhance the flavor. The glaze is applied during the final 30 minutes of cooking, creating a sticky, caramelized finish.
Brown Sugar & Honey Glaze
This classic glaze is a foolproof way to enhance your Appleton spiral ham. Combine ¾ cup packed brown sugar, ¼ cup honey, 2 tablespoons Dijon mustard, and 1 tablespoon apple cider vinegar in a saucepan.
Heat over medium heat, stirring constantly, until the brown sugar is dissolved and the mixture is smooth – about 5 minutes. A pinch of ground cloves can add warmth. Brush generously over the ham during the final 30 minutes of cooking, reapplying every 10 minutes for a beautiful, sticky coating. This glaze provides a perfect balance of sweetness and tang.
Pineapple & Cherry Glaze
For a tropical twist, try this vibrant Pineapple & Cherry Glaze! In a saucepan, combine 1 cup pineapple juice, ½ cup cherry preserves, ¼ cup brown sugar, and 1 tablespoon Dijon mustard.
Bring to a simmer over medium heat, stirring frequently, until slightly thickened – approximately 8-10 minutes. A dash of almond extract complements the flavors beautifully. Generously brush this glaze onto your Appleton spiral ham during the last 20-25 minutes of cooking, repeating every 8-10 minutes. This glaze offers a sweet, fruity, and slightly tart finish.
Maple & Mustard Glaze
Embrace a classic sweet and savory combination with our Maple & Mustard Glaze. In a small saucepan, whisk together ¾ cup pure maple syrup, ¼ cup Dijon mustard, 2 tablespoons apple cider vinegar, and 1 teaspoon smoked paprika.
Heat over medium-low heat, stirring until well combined and slightly warmed – about 5 minutes. This glaze provides a beautiful sheen and a delightful balance of flavors. Apply liberally to your Appleton spiral ham during the final 30 minutes of cooking, basting every 10 minutes for a rich, caramelized crust.
Detailed Oven Cooking Steps
Let’s begin the oven cooking process! Preheat your oven to the temperature specified in the chart (based on your ham’s weight). Place the spiral ham, cut-side down, in a large roasting pan. Add approximately ½ inch of water to the bottom of the pan.
Cover the pan tightly with aluminum foil. This initial covered phase ensures the ham retains moisture. Bake for the majority of the cooking time, then uncover for glazing. Remember to check the internal temperature regularly, aiming for 140°F (60°C) – detailed later!
Initial Heating Phase (Covered)
The covered baking stage is crucial for maintaining the ham’s moisture content. After placing the ham in the roasting pan with water and covering it securely with foil, it’s time to bake. This slow, gentle heating prevents drying and allows the flavors to meld.
Baking time varies significantly based on the ham’s weight – refer to the oven temperature and cooking time chart for precise durations. During this phase, avoid opening the oven frequently, as temperature fluctuations can impact the final result. Patience is key!
Glaze Application – Timing is Crucial
Applying the glaze at the correct moment is paramount for achieving that beautiful, sticky, and flavorful coating. Resist the urge to glaze too early! Wait until the ham has approximately 30-45 minutes of cooking time remaining. This prevents the sugars in the glaze from burning before the ham is fully heated through.
Brush the glaze generously over the entire surface of the ham, ensuring it gets into all the spiral cuts. Repeat this glazing process every 15 minutes for a richer, more pronounced flavor and a stunning appearance.
Final Glazing & Browning
During the last 15-20 minutes of cooking, apply a final, generous coat of glaze. This final layer caramelizes beautifully, creating a rich, glossy finish and intensifying the flavor. Keep a close watch during this stage, as the sugars can burn quickly.
If the glaze begins to darken too rapidly, loosely tent the ham with aluminum foil to shield it from direct heat. The goal is a deep amber color, not a blackened surface. A perfectly glazed ham will exhibit a delightful sheen and an irresistible aroma, signaling it’s ready to serve!
Alternative Cooking Considerations
While oven baking is highly recommended for optimal results, other methods exist, though with caveats. Slow cooker adaptation is possible, but generally not advised due to potential textural issues – the ham may become overly moist and lack the desired caramelized exterior. If attempting, use minimal liquid and a low setting.
Grilling a spiral ham is also limited in applicability. The high, direct heat can easily burn the glaze before the ham is heated through. If grilling, indirect heat and frequent basting with glaze are crucial, requiring constant attention.
Slow Cooker Adaptation (Not Recommended, but Possible)
Using a slow cooker for your Appleton spiral ham isn’t ideal, as it compromises the texture and glaze development. However, if necessary, place the ham cut-side down in the cooker. Add approximately ½ cup of apple juice or pineapple juice to prevent excessive drying, but avoid covering the ham completely with liquid.
Cook on low for 4-6 hours, or until the internal temperature reaches 140°F (60°C). Glaze application is tricky; add it during the last 30-60 minutes, understanding it won’t caramelize as beautifully as in the oven. Expect a softer, less crispy result.
Grilling (Limited Applicability)
Grilling an Appleton spiral ham is challenging due to the high sugar content in the glaze, which can easily burn. If you choose to grill, indirect heat is crucial. Place the ham on a roasting rack over a drip pan, away from direct flames. Maintain a temperature around 250-275°F (121-135°C).
Frequent monitoring is essential to prevent burning. Apply glaze during the last 30-45 minutes, brushing it on carefully. Expect a smoky flavor, but be prepared for potential uneven heating and a need for careful temperature control. Grilling is best suited for smaller hams and experienced grillers.
Safety & Quality Control
Food safety is paramount when handling and cooking any meat product, including Appleton spiral ham. Always wash hands thoroughly before and after handling raw ham packaging. Ensure the ham is sourced from a reputable supplier and displays a “sell-by” or “use-by” date. Inspect the packaging for any damage before purchase.
Proper cooking to a safe internal temperature eliminates harmful bacteria. Avoid cross-contamination by using separate cutting boards and utensils for raw meat and other foods. Refrigerate leftovers promptly and adhere to safe storage guidelines to maintain quality and prevent illness.
Safe Internal Temperature – Reiteration
Let’s emphasize this crucial point: Appleton spiral hams are typically pre-cooked, but they must reach an internal temperature of 140°F (60°C) to ensure complete safety and optimal enjoyment. Use a reliable meat thermometer inserted into the thickest part of the ham, avoiding the bone, to verify this temperature.
This temperature guarantees any potential bacteria are eliminated, providing a safe and delicious meal. Don’t rely on visual cues alone; a thermometer is essential. Reaching 140°F also enhances the ham’s flavor and texture, making it more tender and succulent. Prioritize safety – check that temperature!
Preventing Ham from Drying Out
Maintaining moisture is key to a delicious spiral ham. Because these hams are already cooked, overcooking is the primary cause of dryness. Covering the ham with foil during the initial heating phase traps steam, preventing moisture loss. Basting periodically with pan juices, or even a little apple juice, adds further hydration.
Avoid prolonged exposure to direct heat, and resist the urge to constantly check the temperature – each peek releases valuable moisture. Glazing also helps create a protective barrier, sealing in juices. Remember, a slightly underheated ham is preferable to a dry one!
Handling Leftovers Safely
Proper storage is crucial when dealing with leftover spiral ham. Promptly refrigerate any unused portion within two hours of cooking, reducing bacterial growth. Store ham in airtight containers or tightly wrapped in plastic wrap or foil. Refrigerated ham is best consumed within 3-4 days for optimal quality and safety.
When portioning leftovers, divide them into smaller containers to facilitate quicker cooling and prevent large-scale warming during reheating. Always reheat ham to an internal temperature of 140°F (60°C) to eliminate any potential hazards. Prioritize food safety for a worry-free experience!
Troubleshooting Common Issues
Encountering problems? Let’s address them! Dry Ham: Reduce cooking time or baste frequently with pan juices. Ensure adequate coverage during the initial heating phase. Burning Glaze: Lower oven temperature slightly or shield the ham with foil during the final glazing stage.
Uneven Heating: Verify your oven’s accuracy with an oven thermometer. Rotate the ham halfway through cooking. If the ham isn’t heating through, extend cooking time, checking the internal temperature frequently. Remember, patience and monitoring are key to a successful outcome!
Ham is Too Dry
Discovering a dry ham can be disappointing, but easily remedied! The most common cause is overcooking. Spiral hams are pre-cooked, requiring only reheating. Reduce cooking time in future attempts, and always use a meat thermometer to ensure you don’t exceed the safe internal temperature of 140°F (60°C).
Basting frequently with pan juices, pineapple juice, or even water during reheating helps retain moisture. Covering the ham with foil for the majority of the cooking process also prevents excessive drying. Consider a glaze with a higher sugar content for added moisture!
Glaze is Burning
A burnt glaze is a common concern, especially with sugar-rich recipes! This usually happens during the final glazing and browning stage. Lower the oven temperature slightly during this phase, and watch the ham closely. Applying glaze too early in the cooking process also increases the risk of burning.
Shielding portions of the ham with small pieces of foil can protect them from direct heat. If the glaze begins to darken too quickly, tent the entire ham loosely with foil. Remember, a beautiful glaze is about flavor and appearance – don’t sacrifice taste for color!
Ham Isn’t Heating Through
If your spiral ham isn’t reaching a safe internal temperature, several factors could be at play. First, ensure your oven is accurately calibrated – an oven thermometer is invaluable. A ham that started too cold will require significantly longer cooking time. Avoid opening the oven door frequently, as this releases heat and prolongs the process.
Consider covering the ham with foil for the majority of the cooking time to retain moisture and heat. If it’s still not heating adequately, slightly increase the oven temperature (within safe limits) and continue monitoring with a reliable meat thermometer. Patience is key!
Serving & Enjoying Your Ham
The moment you’ve been waiting for! Once your Appleton spiral ham has rested, it’s time to carve and savor the delicious results. Begin by placing the ham on a sturdy carving board with the flat side down. Utilize a sharp carving knife to carefully separate slices between the spirals – it’s remarkably easy!
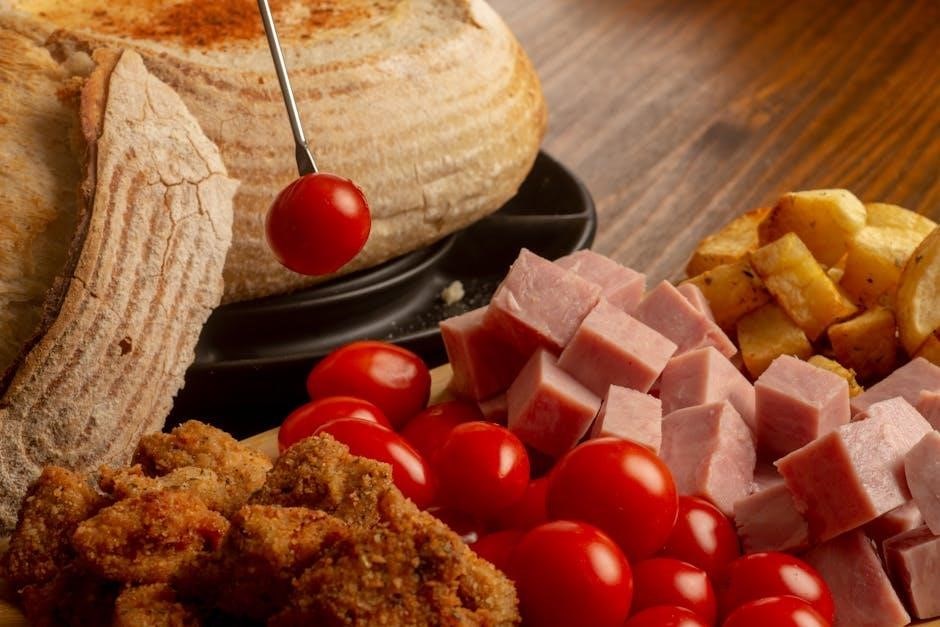
Present your beautifully glazed ham alongside a vibrant array of side dishes. Consider classic pairings like scalloped potatoes, green bean casserole, or a fresh fruit salad. Don’t forget the rolls for enjoying every last bit of that flavorful ham and glaze. Enjoy!
Carving a Spiral Ham – Techniques
Spiral hams are incredibly easy to carve! Begin with the ham resting on a large carving board, flat side down. A long, thin-bladed carving knife is your best friend here. Instead of traditional slicing, you’ll be separating the pre-cut spiral slices.
Gently work the knife along the fat between each spiral, releasing individual portions. Start at one end and work your way across. For a visually appealing presentation, arrange the slices on a platter, slightly overlapping. Don’t worry about perfection; the spiral cut does most of the work for you, making it a stress-free process!
Suggested Side Dishes
A glorious spiral ham deserves equally delightful companions! Classic pairings include scalloped potatoes, creamy mashed potatoes, or au gratin potatoes for a comforting carbohydrate base. Roasted vegetables like Brussels sprouts, carrots, and sweet potatoes offer a vibrant contrast.
For a touch of brightness, consider a pineapple casserole or green bean almondine. Don’t forget the rolls – dinner rolls or Hawaiian rolls complement the ham’s sweetness beautifully. A simple side salad with a vinaigrette dressing provides a refreshing counterpoint to the richness. Enjoy!
Storage & Reheating
Proper storage preserves your ham’s deliciousness! Within two hours of cooking, refrigerate leftover ham in airtight containers or tightly wrapped in plastic wrap. It will remain safe to eat for 3-4 days. For longer storage, freeze in freezer-safe containers for up to 2-3 months.
Reheating is simple. Add a splash of juice or broth to prevent drying. Reheat in a 325°F (160°C) oven until warmed through, approximately 10-15 minutes per pound. Alternatively, microwave individual portions with a damp paper towel. Enjoy the second serving!
Storing Leftover Ham
Maximize freshness with proper storage! Cool leftover Appleton spiral ham quickly – within two hours – before refrigerating. Store it in airtight containers or wrap tightly with plastic wrap to prevent drying and odor absorption. Properly stored, refrigerated ham remains safe for consumption for 3 to 4 days.
For extended storage, freezing is ideal. Divide the ham into portion sizes, wrap securely in freezer-safe wrap or place in freezer bags, removing as much air as possible. Frozen ham can maintain quality for 2-3 months. Label with the date for easy tracking!
Reheating Instructions for Optimal Flavor
Revive that delicious ham flavor! To reheat, add a splash of liquid – apple juice, broth, or even water – to the container to maintain moisture. Cover tightly with foil. For smaller portions, microwave on medium power in 2-minute intervals, checking temperature frequently.
Oven reheating is preferred for larger pieces. Preheat oven to 325°F (160°C). Place ham in a baking dish with liquid, cover with foil, and heat for approximately 10-15 minutes per pound, or until warmed through. Ensure the internal temperature reaches 140°F (60°C) before serving for optimal enjoyment!