
Intex Pool Installation & Maintenance: A Comprehensive Guide
Dive into summer fun! This guide details setup, from initial Intex pool installation through deluxe maintenance kits, ensuring a sparkling, safe experience for all.
Choosing the Right Intex Pool
Selecting the perfect Intex pool requires careful consideration of several factors. First, assess your available space; Intex offers a diverse range, from compact Easy Set pools ideal for smaller yards to larger Ultra Frame pools demanding substantial room.
Next, determine your intended use – is it primarily for children, relaxation, or exercise? This influences the desired depth and size. Consider the pool’s capacity and whether it suits your family’s needs.
Don’t overlook the pool’s shape! Rectangular pools maximize swim space, while round pools are often more affordable and easier to set up. Finally, review available accessories and maintenance kits to ensure a complete and enjoyable experience. Prioritize safety features like ladders and covers.
Site Preparation for Intex Pool Installation
Proper site preparation is crucial for a successful and long-lasting Intex pool installation. Begin by selecting a completely level surface, free from rocks, roots, and any sharp objects that could puncture the pool liner. Clear the area of all debris, ensuring a smooth and safe foundation.
A tarp or ground cloth is essential to protect the liner from damage. Ensure it extends beyond the pool’s perimeter. Consider the proximity to power outlets for the filter pump and avoid locations directly under trees to minimize debris accumulation.
Confirm the ground can support the filled pool’s weight; consult Intex’s guidelines for specific models. Finally, check for underground utilities before digging or leveling to prevent accidental damage.
Essential Tools & Materials
Gathering the right tools and materials streamlines your Intex pool installation. You’ll need a level, measuring tape, and shovel for site preparation. A screwdriver (Phillips and flathead) is vital for frame assembly. Duct tape can be useful for temporary fixes during liner installation.
Essential materials include a ground cloth/tarp, the Intex pool kit itself, a filter pump (often sold separately), and appropriate hoses for connections. PVC pipe and fittings may be required for specific plumbing configurations, as noted in installation guides.
Don’t forget a pool vacuum, test kit, and chemicals for water maintenance. Having these readily available ensures a smooth setup and ongoing enjoyment of your new pool.
Step-by-Step Intex Pool Installation
Begin by carefully unpacking and inspecting all components of your Intex pool kit. Lay out the ground protection (tarp or cushioning) on the prepared site, ensuring it’s free of sharp objects. Assemble the pool frame according to the manufacturer’s instructions, connecting all sections securely.
Once the frame is stable, carefully unroll and position the pool liner inside. Gently smooth out any wrinkles, taking care not to stretch or tear the material. Begin filling the pool with water, continuing to adjust the liner as needed to ensure a snug fit.
Installation typically takes around 90 minutes, but patience is key for a successful setup!
Laying the Ground Protection
Protect your Intex pool liner with a crucial first step: laying down ground protection. Begin by completely clearing the installation area of all rocks, sticks, and any other debris that could puncture the pool floor. A tarp, old carpet, or specialized pool pad provides an essential cushioning layer.
Ensure the protective layer extends beyond the pool’s dimensions on all sides – at least six inches is recommended. This prevents stress on the liner from uneven ground or shifting soil. Smooth out any wrinkles in the protective layer to create a consistently even surface.
Proper ground protection significantly extends the life of your Intex pool!
Assembling the Pool Frame
Constructing a sturdy foundation is key! Begin by laying out all the frame pieces, identifying each component according to the Intex manual. Connect the base rails first, ensuring they snap securely together to form the pool’s perimeter. Next, assemble the uprights, attaching them to the base rails at each corner and along the sides.
Carefully insert the top rails, connecting them to the uprights. Double-check all connections for tightness and stability. A properly assembled frame provides the necessary support for the pool liner and withstands water pressure. Take your time and follow the instructions closely for a safe and durable setup.
Installing the Pool Liner
Carefully unfold the Intex pool liner and spread it out within the assembled frame, ensuring it’s centered. Smooth out any wrinkles or creases, working from the center outwards to avoid air pockets. Gently position the liner, aligning it with the frame’s edges. Avoid dragging the liner across rough surfaces to prevent punctures or tears.
As you position the liner, begin to slightly fill the pool with water. This helps the liner conform to the frame’s shape and further smooth out wrinkles. Continue adding water gradually, periodically adjusting the liner’s position. A properly installed liner is crucial for preventing leaks and maintaining water integrity.
Intex Pool Water Filling & Initial Setup
Begin filling your Intex pool slowly and steadily, continuously checking the liner for proper positioning and wrinkle removal. As the water level rises, continue to smooth out any remaining creases, working from the center outwards. Avoid overfilling, leaving space below the top rail for safety and to prevent splashing.
Once the pool is partially filled, install the ladder securely, ensuring it’s stable and properly anchored. Check all connections and fittings for leaks. Initial water testing is vital; balance the pH and alkalinity before adding any sanitizers. This establishes a healthy base for ongoing water maintenance and a safe swimming environment.
Intex Filter Pump Installation & Operation
Proper filter pump installation is crucial for maintaining clean pool water. Connect the hoses to the inlet and outlet valves, ensuring a tight seal to prevent leaks. Prime the pump by filling it with water before plugging it into a grounded outlet. A 1500 Gal/hr pump is a common choice for many Intex pools.
Operation involves regularly checking the filter pressure and backwashing when needed – typically when the pressure rises 8-10 psi above the clean starting pressure. A consistent filter pump maintenance schedule, including cleaning or replacing the filter cartridge, is essential for optimal performance and water clarity.
Connecting the Filter Pump
Begin by attaching the hoses to the designated inlet and outlet ports on your Intex pool and filter pump. Securely fasten hose clamps to prevent any leakage during operation. Ensure the connections are tight, but avoid over-tightening, which could damage the fittings. Prime the pump by filling it completely with water before powering it on – this prevents damage to the impeller.
Double-check all connections for leaks after priming and starting the pump. Additional Intex valves aren’t always needed for basic setups, but can enhance flow control. A properly connected and primed pump is the foundation for a clean and enjoyable swimming experience.
Filter Pump Maintenance Schedule
Regular maintenance extends your Intex filter pump’s life and ensures optimal performance. Backwash the filter regularly – typically every few weeks, or when pressure increases significantly. Clean the filter cartridge or sand (depending on your pump type) thoroughly every 6 months, or as needed, to remove accumulated debris.
Inspect hoses and connections for cracks or leaks monthly, replacing them promptly if damaged. Lubricate the pump’s O-rings with a silicone-based lubricant to maintain a watertight seal. A consistent schedule, combined with careful observation, will keep your pool water crystal clear and your pump running efficiently for years.
Intex Pool Chemical Balancing
Maintaining proper chemical balance is crucial for a safe and enjoyable swimming experience. Regularly test your pool water using a reliable test kit, checking pH, alkalinity, and sanitizer levels (chlorine or bromine). Ideal pH should be between 7;2 and 7.8, while alkalinity should range from 80 to 120 ppm.
Adjust chemicals as needed, following product instructions carefully. Shock the pool weekly to eliminate combined chlorine and organic contaminants. Consistent monitoring and adjustment prevent algae growth, cloudy water, and irritation to swimmers. Prioritize safety when handling pool chemicals, always adding them to water, never water to chemicals.
Maintaining Water Clarity & Sanitation
Crystal-clear water requires consistent effort. Beyond chemical balancing, regular filtration is paramount. Ensure your Intex filter pump operates sufficiently, cleaning or backwashing the filter as per the manufacturer’s guidelines. A clean filter maximizes efficiency and prevents debris buildup.
Skim the surface daily to remove leaves, insects, and other floating debris. Brush the pool walls and floor weekly to dislodge algae and dirt. Consider using a pool clarifier to enhance filtration and remove fine particles. Proper sanitation, combined with diligent cleaning, guarantees a sparkling, healthy swimming environment for everyone to enjoy all season long.
Intex Pool Cleaning Procedures
Regular cleaning is vital for a pristine pool. Manual vacuuming effectively removes settled debris from the pool floor; slowly and methodically move the vacuum head across the surface, connecting it to the skimmer or dedicated vacuum port. For larger pools, consider an Intex automatic pool cleaner – these robotic devices independently scrub and vacuum, saving time and effort.
Don’t forget to regularly empty the skimmer baskets and pump strainer to maintain optimal water flow. Brushing the pool walls and floor weekly prevents algae growth and buildup. Consistent cleaning, whether manual or automated, ensures a hygienic and inviting swimming experience, extending the life of your Intex pool.
Manual Vacuuming Techniques
Effective manual vacuuming requires a systematic approach. Begin by assembling the vacuum head, hose, and telescopic pole, ensuring secure connections. Prime the hose by submerging it in water until air bubbles cease, then connect it to the skimmer or dedicated vacuum port – a skimmer plate is often needed.

Slowly move the vacuum head across the pool floor in overlapping rows, similar to mowing a lawn. Avoid lifting the head excessively to prevent stirring up debris. For stubborn areas, apply gentle pressure. Once finished, disconnect the hose and rinse the vacuum head. Regular manual vacuuming keeps your Intex pool sparkling clean and prevents algae growth.
Using an Intex Automatic Pool Cleaner
Automatic cleaners simplify pool maintenance significantly. Connect the cleaner’s hose to the skimmer or dedicated vacuum port, ensuring a tight seal. Some models require a debris bag or filter canister – install it correctly before operation. Plug the cleaner into a grounded outlet, and gently place it into the pool.
Allow the cleaner to roam freely, following its programmed cleaning cycle. Monitor its progress initially to ensure it navigates effectively. Regularly empty the debris bag or canister as needed. An Intex automatic cleaner reduces manual vacuuming, saving time and effort while maintaining a consistently clean pool environment. Remember to disconnect and store properly when not in use.
Intex Pool Winterization Steps

Proper winterization protects your Intex pool from freezing damage. Begin by thoroughly cleaning the pool and balancing the water chemistry. Lower the water level below the skimmer opening. Disconnect and drain all hoses, pumps, and filters, storing them indoors. Use a winterizing plug to seal the return jets and skimmer.
Apply a winterizing algaecide to prevent algae growth. Cover the pool with a durable winter cover, securing it tightly to withstand wind and snow. Consider using an air pillow under the cover to prevent water accumulation. Regularly check the cover throughout winter for damage or debris buildup, ensuring a smooth spring opening.
Troubleshooting Common Intex Pool Issues
Facing pool problems? Cloudy water often stems from imbalanced chemicals or a dirty filter – test and adjust accordingly, and clean or backwash the filter. Leaks can occur at connections; tighten clamps or replace O-rings. A malfunctioning pump might indicate a clogged impeller or power issue; inspect and reset as needed.
Algae blooms require chemical treatment and thorough cleaning. If the liner wrinkles, carefully try to smooth it out, but significant wrinkles may require professional attention. Always prioritize safety – disconnect power before any electrical repairs. Regular maintenance prevents many issues, saving time and money!
Intex Pool Maintenance Kit Components
Essential for a pristine pool! A typical Intex Deluxe Maintenance Kit (2008-2011 models) includes a telescoping pole, leaf rake, skimmer net, and vacuum head. These tools facilitate debris removal and cleaning. Chemical components often feature test strips for water analysis, pH increaser/decreaser, and chlorine granules for sanitation.
Some kits also contain a wall brush to combat algae and a cartridge filter cleaner to restore filter efficiency. Understanding each component’s function is crucial for effective pool upkeep. Regularly inspecting and replacing worn parts ensures optimal performance and extends the kit’s lifespan, keeping your pool sparkling clean and inviting.
Intex Pool Ladder Installation & Safety
Secure entry and exit are paramount! Begin by placing the Intex pool ladder on a level surface outside the pool. Ensure the side rails extend beyond the pool’s top edge for a secure grip. Carefully attach the ladder steps, verifying each is firmly locked into place. Always follow the manufacturer’s instructions precisely during assembly.
Safety is crucial: never allow unsupervised access, especially for children. Install a safety barrier around the pool. Regularly inspect the ladder for loose steps or corrosion. Consider adding handrails for enhanced stability. Proper installation and consistent maintenance prevent accidents and provide peace of mind for all pool users.
Intex Pool Repair Guide (Minor Leaks)
Addressing small leaks promptly prevents larger issues! First, identify the leak’s source – often around seams, fittings, or the liner. For pinhole leaks, a vinyl repair patch is ideal; clean and dry the area thoroughly before applying the adhesive. Ensure the patch extends well beyond the leak’s edges.
For leaks at fittings, tighten connections or replace worn washers. If the liner has a small tear, a liner repair kit provides a durable solution. Always follow the kit’s instructions carefully. Regularly inspect your Intex pool for potential leaks, and address them immediately to maintain water levels and prevent structural damage.
Understanding Intex Pool Valve Systems
Intex pool valve systems manage water flow for filtration and drainage. Typically, these systems involve multiple valves – inlet, outlet, and drain valves – often connected with PVC piping. The filter pump pushes water through the inlet, into the filter, and back to the pool via the outlet.
Drain valves facilitate emptying the pool for maintenance or winterization. Understanding valve positions is crucial; incorrect settings can damage the pump or hinder filtration. Additional Intex valves can customize water circulation. Regularly inspect valves for cracks or leaks, ensuring tight connections for optimal performance and preventing water loss.
Intex Pool Safety Regulations & Best Practices
Prioritizing safety around your Intex pool is paramount. Always supervise children closely, never leaving them unattended, even for a moment. Install a secure ladder with safety rails, ensuring easy access and preventing slips. Establish clear pool rules – no running, diving in shallow areas, or horseplay.
Consider a safety fence surrounding the pool, particularly if young children are present. Learn CPR and keep rescue equipment readily available. Regularly check the pool area for hazards like broken glass or slippery surfaces. Adhering to local regulations regarding pool barriers and safety features is essential for responsible pool ownership.
Extending the Lifespan of Your Intex Pool
Maximize your investment with proactive pool care. Proper winterization is crucial; thoroughly clean, drain, and cover the pool to protect it from freezing temperatures and debris. Regularly inspect the liner for punctures or tears, promptly repairing any damage to prevent leaks and further deterioration.
Maintain balanced water chemistry to prevent corrosion and scaling, safeguarding the pool frame and components. Store the pool components in a dry, protected area during the off-season. Avoid abrasive cleaners that can damage the liner. Consistent maintenance and careful handling will significantly extend the life of your Intex pool, ensuring years of enjoyment.
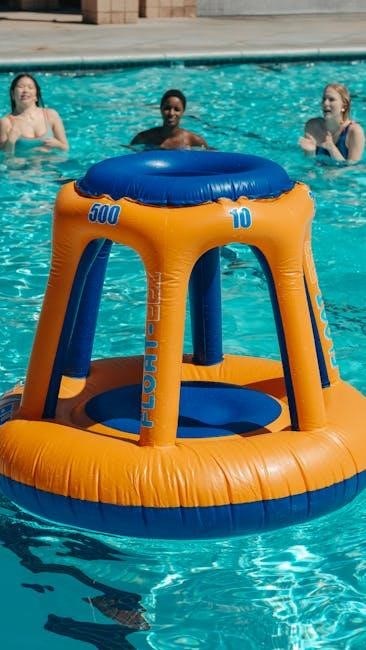
Intex Pool Accessories & Upgrades
Enhance your pool experience with smart additions! Consider an automatic pool cleaner for effortless maintenance, reducing manual vacuuming time and effort. Upgraded filter pumps offer improved circulation and filtration, maintaining pristine water quality. Safety ladders provide easy access, while pool lights extend enjoyment into the evening hours.
Explore solar covers to retain heat and reduce evaporation, saving energy and water. Various Intex valves can optimize water flow and filtration efficiency. Don’t forget comfortable pool floats and fun games for added entertainment! Investing in quality accessories not only improves functionality but also elevates the overall enjoyment of your Intex pool.