
Aroma 4-Cup Rice Cooker: A Comprehensive Manual Guide
This guide details safe operation, cooking procedures, and maintenance for your Aroma 4-cup rice cooker, ensuring optimal performance and longevity.
Understanding Your Aroma 4-Cup Rice Cooker
Your Aroma 4-cup rice cooker is a versatile kitchen appliance designed for simple and efficient cooking. It’s more than just a rice cooker; it can steam vegetables, cook oatmeal, and even prepare soups! Before first use, ensure the cooker is in good condition and familiarize yourself with all components.
This manual provides crucial safety precautions and detailed instructions. Proper use guarantees delicious results and extends the lifespan of your appliance. Remember to always wash the inner pot before initial operation. The timer knob allows for precise cooking control, while the cook and warm settings offer flexibility. Understanding these features unlocks the full potential of your Aroma cooker.
Key Components and Their Functions
The Aroma 4-cup rice cooker comprises several key parts working in harmony. The inner pot is where the magic happens – ensure it’s thoroughly washed before each use. The water bowl (10) is essential for steaming and adds moisture during cooking. The timer knob (12) precisely controls cooking duration, offering customized results.
The ‘Cook’ and ‘Warm’ settings manage the cooking cycle and maintain temperature post-cooking. The steam vent releases excess steam, preventing pressure build-up. Regularly inspect these components for cleanliness and proper function. A well-maintained cooker ensures consistent performance. Understanding each part’s role is vital for optimal operation and achieving perfectly cooked meals every time.
Safety Precautions Before First Use
Prior to your initial use, carefully inspect the Aroma 4-cup rice cooker for any damage. Ensure the power cord is intact and free from fraying. Before plugging in, verify the voltage compatibility with your household current. Always operate the cooker on a stable, heat-resistant surface, away from flammable materials.
Never immerse the cooker base in water or any other liquid. Avoid using extension cords if possible; if necessary, use a heavy-duty cord. Keep the cooker out of reach of children. Familiarize yourself with all safety guidelines outlined in the instruction manual. Following these precautions will guarantee safe and enjoyable cooking experiences.

Getting Started: Preparing to Cook
Begin by thoroughly washing all removable parts, then accurately measure your rice, and consult the water level guidelines for optimal results.
Washing the Inner Pot and Accessories
Before your first use, and after each subsequent cooking session, meticulous cleaning is essential. Begin by removing the inner pot and all accessories – the steam vent, measuring cup, and water bowl – from the rice cooker base. Wash these components with warm, soapy water. Avoid using abrasive cleaners or scouring pads, as these can damage the non-stick coating of the inner pot.
Rinse thoroughly to remove all traces of soap. Pay particular attention to the steam vent, ensuring it is free from any food particles that could obstruct steam flow. The inner pot is often dishwasher safe (check your model’s specific instructions), but hand washing is recommended to prolong its lifespan. Dry all parts completely before reassembling and storing or using the rice cooker again. Proper cleaning prevents build-up and ensures hygienic cooking.
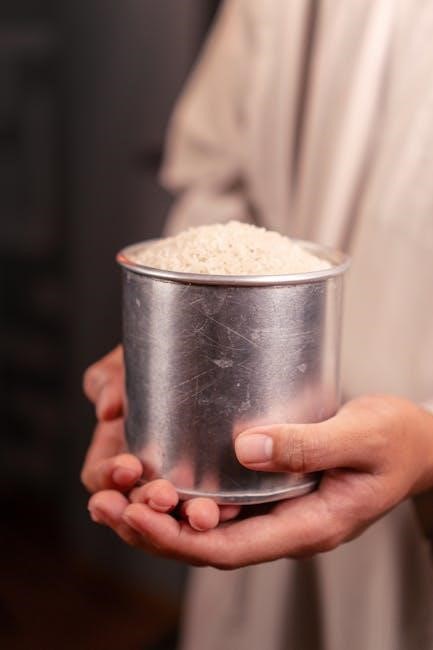
Measuring Rice Accurately
Precise rice measurement is crucial for optimal cooking results. Always use the measuring cup specifically provided with your Aroma 4-cup rice cooker. Standard measuring cups may yield inaccurate amounts, leading to undercooked or overcooked rice. For best results, level off the rice in the measuring cup – do not heap it.
One cup of rice typically yields approximately two cups of cooked rice. Refer to the water level guidelines (detailed in the next section) corresponding to the amount of rice you’ve measured. Half a glass of rice is a common starting point for smaller portions. Consistent measurement ensures consistent, perfectly cooked rice every time, avoiding mushy or hard textures.
Water Level Guidelines for Different Rice Types
Proper water ratios are essential for each rice variety. For white rice, use a 1:1 water-to-rice ratio (e.g., 1 cup rice to 1 cup water). Brown rice requires more water – typically a 1:1.5 ratio (1 cup rice to 1.5 cups water) due to its bran layer. Jasmine rice benefits from a slightly reduced ratio, around 1:0.8 (1 cup rice to 0.8 cups water) for fragrant, fluffy results.
Always fill water into the water bowl (10) as indicated in the cooker’s markings. These are guidelines; adjustments may be needed based on personal preference and rice freshness. Experiment to find your ideal consistency. Remember, adding too little water results in hard rice, while too much leads to mushiness.

Cooking Rice: Step-by-Step Instructions
Follow these simple steps for perfectly cooked rice: wash rice, add water, close the lid, set the timer, and let the cooker do its work!
White Rice Cooking Procedure
Preparing white rice is straightforward with your Aroma 4-Cup Rice Cooker. Begin by thoroughly washing the rice to remove excess starch – this prevents stickiness. Use the measuring cup provided; typically, one cup of rice requires two cups of water for a fluffy texture. Place the washed rice and water into the inner pot, ensuring it’s properly seated within the cooker.
Secure the lid tightly and turn the timer knob to the “White Rice” setting. The cooker will automatically switch to the “Warm” setting once cooking is complete. Allow the rice to steam for 10-15 minutes with the lid closed for optimal results. Fluff gently with a fork before serving. Adjust water levels slightly based on your preferred rice consistency.
Brown Rice Cooking Procedure
Cooking brown rice requires a slightly different approach due to its bran layer. Begin by rinsing the brown rice thoroughly under cold water. Brown rice generally needs more water than white rice; a common ratio is one cup of rice to 2.5 cups of water. Place the rinsed rice and water into the inner pot, ensuring it’s correctly positioned.
Secure the lid and select the “Brown Rice” setting on the timer knob. The cooking time is longer for brown rice, allowing it to fully soften. Once the cooker switches to “Warm,” let the rice steam, covered, for 10-15 minutes. Fluff with a fork before serving. Adjust water slightly for desired texture – more water for softer rice.
Jasmine Rice Cooking Procedure
Jasmine rice, known for its fragrant aroma, benefits from a specific cooking method. Rinse the jasmine rice gently under cold water until the water runs clearer – avoid excessive rinsing, as it removes starch. A typical ratio is one cup of jasmine rice to 1.5 cups of water, though slight adjustments can be made for preferred texture.
Place the rinsed rice and water into the inner pot. Secure the lid and set the timer knob to the “White Rice” setting. Jasmine rice cooks relatively quickly. Once the cooker switches to “Warm,” allow it to steam, covered, for 10 minutes. Gently fluff with a fork to separate the grains before serving, preserving its delicate texture.

Beyond Rice: Versatile Cooking Options
Expand your culinary horizons! This cooker excels at steaming vegetables, cooking oatmeal, and even preparing simple soups and stews with ease.
Steaming Vegetables and Fish
Unlock healthy cooking with the steaming function! Place a heat-safe steaming basket inside the rice cooker. Add water to the inner pot – the amount depends on the steaming time desired for your vegetables or fish. Ensure the water level doesn’t touch the basket’s bottom.
Arrange your chosen ingredients within the steaming basket, ensuring even spacing for consistent cooking. Secure the lid and select the ‘Cook’ setting. Once the cooker switches to ‘Warm’, carefully check for doneness. Delicate vegetables may require less time than fish.
This method preserves nutrients and flavors beautifully, offering a lighter alternative to traditional cooking. Remember to exercise caution when removing the hot basket and steamed food.
Cooking Oatmeal and Porridge
Enjoy a warm and comforting breakfast effortlessly! Combine rolled oats or your preferred porridge grain with water or milk directly in the inner pot. A typical ratio is 1 part oats to 2 parts liquid, but adjust to your desired consistency.
Add a pinch of salt and optional sweeteners like sugar or cardamom for enhanced flavor. Secure the lid and select the ‘Cook’ setting. Monitor closely, as oatmeal can quickly boil over. Once switched to ‘Warm’, stir well to prevent sticking.
For creamier porridge, use milk instead of water. Experiment with different grains and toppings to create your perfect breakfast bowl!
Making Soups and Stews
Expand your culinary horizons beyond rice! The Aroma cooker is surprisingly adept at creating simple soups and stews. Begin by sautéing vegetables like onions and carrots directly in the inner pot using a small amount of oil – be mindful of sticking.
Add your broth, protein (chicken, beans, or lentils), and seasonings. Secure the lid and select the ‘Cook’ setting. Allow the cooker to cycle through to ‘Warm’ for simmering.
Stir occasionally to prevent burning and ensure even cooking. Remember the 4-cup capacity; adjust recipes accordingly. Avoid overly thick stews that might scorch. Enjoy a convenient, one-pot meal!

Operation and Features
Explore the Aroma cooker’s intuitive controls! Utilize the timer knob for precise cooking, understanding the ‘Cook’ and ‘Warm’ settings, and the water bowl’s function.
Using the Timer Knob for Precise Cooking
The timer knob (12) is central to controlling your Aroma 4-Cup Rice Cooker’s cooking duration. Turning this knob allows you to set the precise time needed for various recipes, extending beyond simple white rice. Experimentation is encouraged to find the ideal setting for different rice types and desired textures.
Remember that cooking times will vary based on the amount of rice used and the initial water temperature. Begin with the recommended times in the manual and adjust accordingly based on your preferences. Consistent use will help you master the timer knob and achieve perfectly cooked results every time. It’s a key feature for versatile cooking!
Understanding the Cook and Warm Settings
Your Aroma 4-Cup Rice Cooker features two primary settings: Cook and Warm. The ‘Cook’ setting initiates the cooking cycle, bringing the water to a boil and then simmering the rice until it’s fully cooked. Once the cooking cycle completes, the cooker automatically switches to the ‘Warm’ setting.
The ‘Warm’ setting maintains the rice at an optimal serving temperature without overcooking it. This is incredibly convenient for keeping rice warm for extended periods. Avoid leaving rice on the ‘Warm’ setting for more than 12 hours to prevent drying or changes in texture. These settings provide flexibility and convenience for meal preparation and enjoyment.
The Role of the Water Bowl
The water bowl within your Aroma 4-Cup Rice Cooker plays a crucial role in steaming functions and maintaining optimal moisture levels. When steaming vegetables or fish, water is added to this bowl, creating steam that cooks the food gently and evenly. The amount of water used directly impacts steaming time and results.
Even when not steaming, a small amount of water in the bowl can enhance rice texture. It helps regulate humidity during the cooking process, preventing the rice from becoming too dry. Regularly check and refill the water bowl as needed, ensuring it doesn’t run dry during operation for best performance.
Maintenance and Cleaning
Regular cleaning extends your Aroma cooker’s life. Proper procedures for the inner pot, steam vent, and exterior prevent build-up and odors effectively.
Proper Cleaning Procedures for the Inner Pot
After each use, promptly wash the inner pot with warm, soapy water. Avoid abrasive cleaners or scouring pads, as these can damage the non-stick coating. For stubborn food residue, soak the pot in warm water for several minutes before washing.
Ensure all traces of soap are rinsed away thoroughly. The inner pot is typically dishwasher safe (check your model’s specific instructions), offering a convenient cleaning option. However, hand washing is recommended to preserve the coating’s integrity over time.
Dry the inner pot completely before storing to prevent corrosion or the development of odors. Inspect the pot regularly for any signs of damage, such as scratches or peeling, and replace it if necessary to maintain optimal cooking performance.
Cleaning the Steam Vent and Exterior
Regularly clean the steam vent to prevent blockages that can affect cooking performance. Use a damp cloth or a small brush to remove any starch or food particles accumulated around the vent opening. Ensure the vent is completely clear before each use.
For the exterior, wipe down the rice cooker with a soft, damp cloth. Avoid using harsh chemicals or abrasive cleaners, as they can damage the finish. A mild dish soap solution can be used for tougher stains, but rinse thoroughly and dry immediately.
Never immerse the rice cooker base in water. Pay attention to areas around the control panel, cleaning gently to avoid liquid intrusion. Consistent exterior cleaning maintains the appliance’s appearance and prevents food build-up.
Preventing Food Build-Up and Odors
To minimize food build-up, promptly clean the inner pot after each use. Even seemingly minor residue can bake on and become difficult to remove. Thorough cleaning prevents lingering odors and ensures optimal cooking performance. A quick wipe-down while the pot is still warm is often effective.
For stubborn odors, a solution of baking soda and water can be simmered in the cooker for a short period. This helps neutralize smells. Ensure the cooker is unplugged during this process.
Regularly inspect the water bowl and steam vent for any accumulated starch or food particles. Proper maintenance prevents unpleasant smells and extends the life of your Aroma rice cooker.
Troubleshooting Common Issues
This section addresses typical problems like mushy rice, cooker malfunctions, and steam leaks, offering solutions to ensure consistent and successful cooking experiences.
Rice is Too Mushy or Too Hard
Mushy rice often indicates excessive water; reduce the water level slightly in your next cooking attempt. Conversely, hard or undercooked rice suggests insufficient water. Experiment with small adjustments – adding a tablespoon or two – to find the perfect water-to-rice ratio for your preferred rice type.
Ensure accurate rice measurement using a dedicated measuring cup. Different cup sizes can lead to inconsistencies. Also, verify the timer knob setting is appropriate for the rice variety. White rice requires less cooking time than brown rice.

Stirring the rice after cooking can also help redistribute moisture, improving texture. If problems persist, check the steam vent for blockages, as this can affect cooking temperature and consistency.
Rice Cooker Won’t Turn On
First, confirm the rice cooker is securely plugged into a functioning electrical outlet. Test the outlet with another appliance to rule out a power supply issue. Inspect the power cord for any visible damage, such as cuts or fraying. If damage is present, do not use the cooker and consider replacement.
Ensure the inner pot is correctly positioned within the cooker. A proper fit is crucial for establishing the electrical connection needed to initiate the cooking cycle. Check that the control panel isn’t locked or in a standby mode, if applicable.
If the issue persists, consult the instruction manual for specific troubleshooting steps related to your model.
Steam Leaking During Cooking
Some steam release during cooking is normal, particularly when initially heating up or during the final steaming phase. However, excessive or forceful steam leakage could indicate an issue with the sealing ring or the lid’s proper closure. Ensure the lid is securely locked into place, following the cooker’s instructions.
Inspect the steam vent for any obstructions, such as food particles, that might be causing pressure build-up and forcing steam to escape elsewhere. Clean the vent thoroughly. Verify the water bowl (if your model has one) isn’t overfilled, as this can contribute to increased steam production.
If leakage continues, avoid touching the escaping steam to prevent burns and consult the manual for further guidance.

Additional Tips and Recipes
Enhance your cooking! Explore spices, herbs, and diverse rice varieties to adapt recipes for the 4-cup capacity, maximizing flavor and versatility.
Flavoring Rice with Spices and Herbs
Elevate your rice dishes with simple additions! A dash of cardamom during cooking, as suggested for milk rice recipes, infuses a warm, aromatic sweetness. Experiment with other spices like turmeric for color and health benefits, or cumin for an earthy flavor. Fresh herbs, added after cooking, provide a vibrant finish – consider parsley, cilantro, or chives.
For a savory twist, incorporate a bay leaf during the cooking process, removing it before serving. A pinch of saffron can create a luxurious golden hue and delicate flavor. Remember to adjust spice quantities to your preference. The Aroma 4-cup cooker’s consistent cooking ensures even distribution of flavors, resulting in perfectly seasoned rice every time. Don’t be afraid to get creative and personalize your meals!
Exploring Different Rice Varieties
Beyond standard white rice, the Aroma 4-cup cooker excels with diverse grains! Jasmine rice, known for its floral aroma, requires slightly less water than long-grain white rice. Brown rice, a whole grain, necessitates a longer cooking time and more water for optimal texture. Experiment with basmati for a fluffy, distinctively fragrant result.
Consider short-grain rice for stickier dishes, ideal for sushi or rice pudding. Each variety benefits from adjusted water levels – consult the ‘Water Level Guidelines’ section for specifics. The cooker’s versatility allows you to explore wild rice blends or even risotto rice, though risotto requires more attentive stirring. Discover new flavors and textures, expanding your culinary horizons with the Aroma cooker!
Adapting Recipes for the 4-Cup Capacity
Scaling recipes for the Aroma 4-cup cooker is straightforward! Remember that “cups” refer to the measuring cup included with your appliance, not standard liquid cups. Generally, one “cup” of uncooked rice yields approximately three cups of cooked rice. When converting larger recipes, divide ingredient quantities proportionally to fit the 4-cup maximum capacity.
For soups and stews, avoid overfilling – leave space for expansion during cooking. When steaming, ensure vegetables or fish aren’t packed too tightly to allow for even cooking. Adjust cooking times slightly downwards for smaller batches. Always prioritize safety and avoid exceeding the maximum fill line. Experiment and enjoy perfectly portioned meals!