Kenmore Mini Ultra Sewing Machine User Manual: A Comprehensive Guide
Discover essential guidance for your Kenmore Mini Ultra! Access downloadable manuals, troubleshooting tips, and community support for seamless sewing experiences.
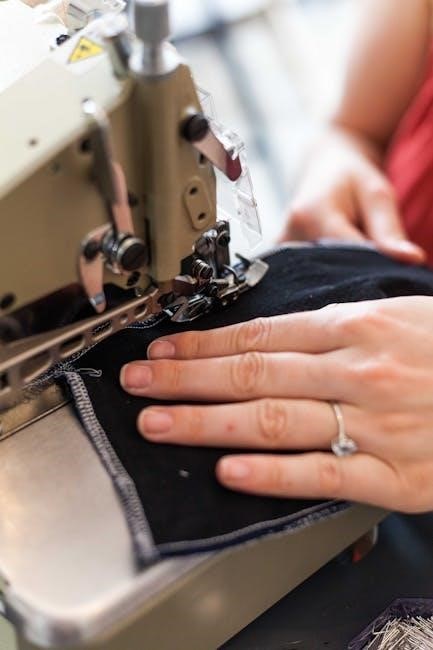
The Kenmore Mini Ultra sewing machine represents a compact and accessible entry point into the world of sewing. Often favored for its portability and ease of use, this machine is a popular choice for beginners and those needing a lightweight solution for quick repairs or small projects. However, its simplicity can sometimes present challenges, particularly concerning bobbin tangling – a common issue reported by users online, as noted in Reddit discussions.
Finding resources for this vintage machine can require some digging. While not always readily available, instruction manuals, often in PDF format, can be located through Sears Parts Direct and dedicated Kenmore sewing machine manual websites. These resources are invaluable for understanding the machine’s specific features and operation, ensuring a smoother sewing experience. Understanding its capabilities is key to maximizing its potential.
Understanding the Machine’s Features
The Kenmore Mini Ultra, despite its compact size, offers a range of basic sewing functionalities; Manuals, often spanning around 50 to 107 pages (as indicated by available documentation for similar Kenmore models), detail stitch selection, length, and width adjustments. While advanced features like automatic buttonholing or extensive decorative stitches are typically absent, it reliably handles straight and zigzag stitches.
Its core appeal lies in its simplicity and portability. Users should consult the manual to fully grasp its operational nuances. Online communities, like those found on Reddit, highlight the importance of understanding the machine’s limitations and potential issues, such as bobbin tangling. Familiarizing yourself with these aspects will enhance your sewing experience.
Safety Precautions
Prioritize safety when operating your Kenmore Mini Ultra. Always disconnect the machine from the power source (if applicable) before threading, changing the needle, or performing any maintenance. Keep fingers away from moving parts, particularly the needle and presser foot, during operation to prevent injury.
Never force the fabric through the machine; allow the feed dogs to guide it. Ensure the area around the machine is well-lit and free of obstructions. Supervise children closely if they are near the sewing machine. Refer to the official manual for detailed safety guidelines and warnings specific to your model, ensuring a secure and enjoyable sewing experience.
Setting Up Your Sewing Machine
Prepare for successful projects! This section details unboxing, powering, bobbin installation, and upper threading – essential steps for your Kenmore Mini Ultra.
Unboxing and Initial Inspection
Carefully remove your Kenmore Mini Ultra sewing machine from its packaging. Retain the box and packing materials for potential future transport or storage needs. A thorough initial inspection is crucial. Verify that all included accessories are present – typically, this includes presser feet, bobbins, needles, a screwdriver, and potentially a seam ripper or spool pin.
Inspect the machine itself for any visible signs of damage incurred during shipping. Look closely at the exterior casing, the power cord (if applicable), and the needle clamp area. Ensure the handwheel turns freely. Confirm the bobbin case is securely in place. Refer to the included parts list within the manual (or downloadable PDF) to cross-reference and confirm everything is accounted for. Document any discrepancies immediately with the retailer.
Powering the Machine (if applicable)
The Kenmore Mini Ultra may operate on battery power or with an AC adapter, depending on the specific model. If utilizing batteries, ensure they are correctly installed, observing the polarity markings (+ and -) within the battery compartment. For AC adapter operation, connect the adapter firmly to the machine’s power input and then plug it into a grounded electrical outlet.
Before switching the machine on, verify the voltage compatibility between the adapter and your local power supply. A power switch is typically located on the machine’s body; ensure it’s in the ‘off’ position before connecting or disconnecting power. Never force the power cord or adapter. If the machine doesn’t power on, double-check all connections and battery levels.
Installing the Bobbin
Begin by selecting a compatible bobbin for your Kenmore Mini Ultra. Open the bobbin cover, typically located underneath the needle plate. Insert the bobbin into the bobbin case, ensuring it rotates freely and the thread unwinds in the correct direction – usually counter-clockwise.
Guide the thread through the tension spring of the bobbin case, and then through the designated slot or path. Close the bobbin cover securely. Gently pull on the bobbin thread to confirm it’s properly engaged. A correctly installed bobbin is crucial for consistent stitch formation and preventing tangling issues, a common concern with this model.
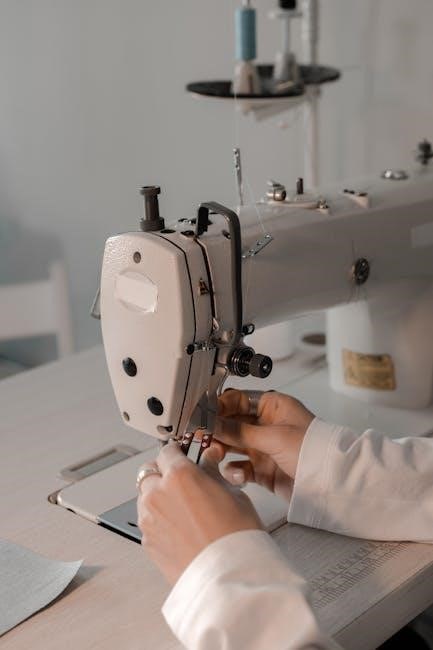
Threading the Upper Thread
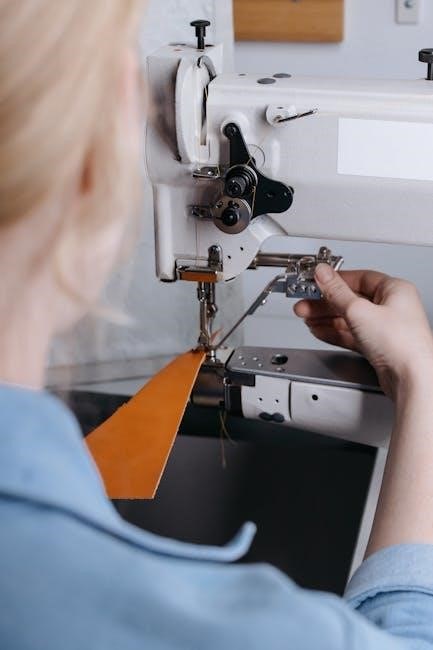
Start by raising the presser foot; this opens the tension discs for proper thread flow. Place the spool of thread on the spool pin. Guide the thread through the first thread guide, then down and around the tension discs, ensuring it seats firmly between them.
Continue threading through the take-up lever, and then down through the needle clamp. Finally, thread the needle from front to back. Gently pull the thread a few inches to confirm it’s correctly seated. Proper threading is vital for consistent stitching and preventing thread breakage, a frequent issue reported by users.
Basic Sewing Operations
Master fundamental techniques! Learn stitch selection, length/width adjustments, and practice straight and zigzag stitches for successful projects with your Kenmore Mini Ultra.
Selecting Stitch Types
The Kenmore Mini Ultra, despite its compact size, offers a selection of stitches to accommodate various sewing needs. Typically, this machine features straight stitches for general sewing, and zigzag stitches for finishing raw edges, creating buttonholes (potentially with an attachment), and applying stretch fabrics.
To select a stitch, locate the stitch selection dial – often a rotating knob or a series of buttons. Refer to the diagrams in your user manual to understand which number or symbol corresponds to each stitch type. Experiment with different stitches on scrap fabric to observe their appearance and suitability for your project. Remember that the available stitch options may vary slightly depending on the specific model of your Kenmore Mini Ultra. Always test your chosen stitch before beginning your actual sewing.
Adjusting Stitch Length and Width
Precise control over stitch length and width is crucial for achieving professional-looking results with your Kenmore Mini Ultra. Typically, separate dials or sliders control these settings. Stitch length determines the distance between each stitch, influencing the fabric’s durability and appearance – shorter for delicate fabrics, longer for heavier materials.
Stitch width, primarily affecting zigzag stitches, controls the breadth of the stitch. Wider settings are ideal for decorative applications or securing stretchy fabrics, while narrower settings offer a more subtle finish; Always test adjustments on scrap fabric before sewing your project. Consult your manual for specific dial markings and recommended settings for different fabrics and stitch types.
Sewing Straight Stitches
Mastering the straight stitch is fundamental to sewing. Begin by selecting the straight stitch option on your Kenmore Mini Ultra, usually indicated by a straight line symbol. Ensure your fabric is positioned correctly under the presser foot, aligning the desired seam allowance with the edge guide.
Gently lower the presser foot and begin sewing at a slow, consistent speed. Guide the fabric smoothly, avoiding pulling or pushing. Maintain a steady hand and focus on keeping the edge of the fabric aligned with the guide. For longer seams, use the handwheel to precisely control the stitch placement. Practice on scrap fabric to develop a consistent technique before tackling your project.
Sewing Zigzag Stitches
Zigzag stitches offer versatility for finishing raw edges, creating decorative elements, and sewing stretch fabrics. Select the zigzag stitch option on your Kenmore Mini Ultra, adjusting the stitch width as needed – wider for more stretch or decorative effects, narrower for edge finishing.
Test the stitch on scrap fabric to confirm the desired appearance. When sewing, guide the fabric smoothly, allowing the zigzag needle to oscillate freely. Zigzag stitches are excellent for preventing fabric fraying and providing flexibility in seams. Experiment with different stitch widths and lengths to achieve various textures and finishes. Remember consistent speed is key for uniform results.

Troubleshooting Common Issues
Resolve frequent problems like bobbin tangles, thread breaks, and machine jams with our guide! Ensure smooth operation and extend your machine’s lifespan.
Bobbin Tangling Problems
Frequent bobbin tangles are a common issue reported with the Kenmore Mini Ultra. This often stems from improper threading of either the upper thread or the bobbin itself. Ensure the bobbin is wound evenly and not too tightly, as this can cause resistance.
Double-check that the bobbin is inserted correctly into the bobbin case, following the diagram in your manual. Verify the upper thread is properly seated in the tension discs. Sometimes, using a different type of thread or a new needle can alleviate the problem. If tangles persist, carefully clean the bobbin area, removing any lint or debris that may be contributing to the issue. Remember to re-thread both the upper thread and bobbin after cleaning.
Thread Breakage Solutions
Persistent thread breakage with your Kenmore Mini Ultra can be frustrating. First, ensure you’re using the correct needle size for the fabric weight. A needle too small will strain the thread. Secondly, re-thread the machine completely, verifying the thread is properly seated in all guides and the tension discs.
Inspect the needle for any damage – even a slight burr can cause breaks. Try a different spool of thread; some threads are weaker than others. Adjust the upper thread tension; too tight or too loose can lead to breakage. Finally, clean the machine, removing lint buildup, as this can create friction. If the problem continues, consider a new needle.
Needle Breakage Prevention
Preventing needle breakage on your Kenmore Mini Ultra starts with selecting the right needle type for your fabric. Use universal needles for woven fabrics, ballpoint needles for knits, and denim needles for heavier materials. Always ensure the needle is correctly inserted, with the flat side facing the back.
Avoid sewing over pins – this is a major cause of breakage. Never force the fabric through the machine; let the feed dogs do the work. Check for hidden pins or thick seams before starting to sew. Regularly replace your needle, even if it doesn’t appear damaged, as they can become dull. Finally, avoid excessive speed when sewing through thick layers.
Machine Jamming and How to Clear It
If your Kenmore Mini Ultra jams, immediately stop and disconnect the power. Never force anything! First, remove the bobbin case and check for tangled threads or fabric pieces. Gently clean out any lint with a small brush. Next, lift the presser foot and carefully remove the fabric around the needle area.
Inspect the upper thread path for obstructions. Re-thread the machine, ensuring the thread is properly seated in all guides. If the jam persists, check the bobbin winding mechanism for issues. Remember to always refer to the manual for specific diagrams and instructions for your model.

Maintenance and Care
Ensure longevity by regularly cleaning, oiling, and replacing the needle on your Kenmore Mini Ultra sewing machine for optimal performance.
Cleaning the Machine
Regular cleaning is vital for maintaining your Kenmore Mini Ultra’s performance and preventing issues like thread tangling or jamming. Always disconnect the power before cleaning, even if it’s a manual machine. Use a soft brush – a small paintbrush works wonderfully – to remove lint and dust from the bobbin area, feed dogs, and around the needle plate.
For stubborn lint, a vacuum cleaner with a brush attachment can be helpful. Avoid using compressed air, as it can blow dust further into the machine. Wipe down the exterior with a slightly damp cloth; avoid harsh chemicals or abrasive cleaners. Pay attention to oil buildup, as it attracts dust. A clean machine sews better and lasts longer, ensuring many happy crafting hours with your Kenmore Mini Ultra!
Oiling the Machine
Proper lubrication ensures smooth operation of your Kenmore Mini Ultra. Locate the oiling points – typically indicated in your machine’s manual, but generally around the bobbin area, shuttle hook, and any moving parts. Use only sewing machine oil; other oils can gum up the mechanism. Apply a small drop to each point, and then operate the machine slowly by hand to distribute the oil evenly.
Avoid over-oiling, as excess oil attracts dust and lint. Wipe away any excess oil with a clean cloth. Regular oiling – every few hours of sewing – will prevent friction, reduce wear and tear, and keep your Kenmore Mini Ultra running quietly and efficiently for years to come.
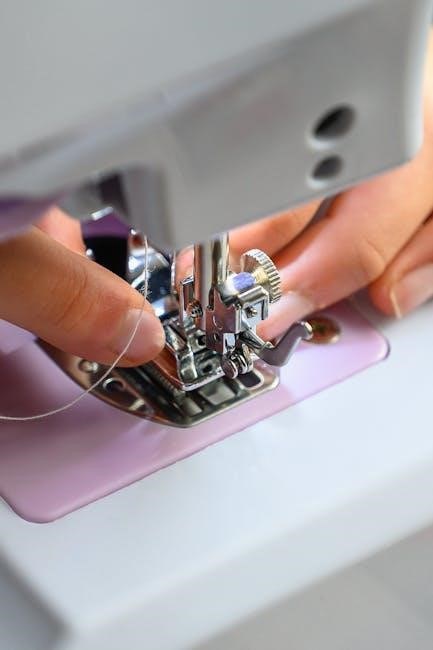
Replacing the Needle
A dull or bent needle can cause skipped stitches, thread breakage, and even damage to your fabric. To replace the needle on your Kenmore Mini Ultra, first ensure the machine is turned off. Locate the needle screw – usually a small screw on the needle clamp. Loosen the screw with the appropriate screwdriver (often included with the machine).
Remove the old needle and insert a new one, ensuring the flat side of the needle faces the back of the machine. Tighten the needle screw securely, but not excessively. Always use the correct needle type and size for your fabric. Regularly inspect your needle for damage and replace it as needed.
Storage Recommendations
Proper storage extends the life of your Kenmore Mini Ultra. Always unplug the machine and remove the bobbin before storing it. Cover the machine with a dust cover to protect it from dust and debris. Store it in a cool, dry place, away from direct sunlight and extreme temperatures;
Avoid storing the machine in damp environments, as this can cause rust and corrosion. If possible, store the machine in its original packaging. Keep all accessories, such as presser feet and bobbins, together with the machine. Periodic cleaning before storage ensures optimal performance upon retrieval.
Advanced Features (If Applicable)
Explore potential buttonhole and zipper capabilities! Discover attachment options to enhance your Kenmore Mini Ultra’s versatility and creative sewing projects.
Buttonhole Sewing
Achieving perfectly formed buttonholes with the Kenmore Mini Ultra requires precision and understanding of its capabilities. While information specifically detailing buttonhole sewing on this model is scarce in readily available manuals, the general principle involves utilizing a buttonhole foot (if included with your machine or available as an attachment).
Begin by selecting the appropriate buttonhole stitch setting, if available. Carefully position your fabric, and slowly lower the presser foot. Guide the fabric, allowing the machine to complete the buttonhole sequence – typically a series of zigzag stitches forming the outline.
Practice on scrap fabric first to adjust stitch density and length for optimal results. Remember to consult any supplemental documentation or online resources specifically for similar Kenmore models, as techniques may vary. Patience and experimentation are key to mastering buttonhole creation!
Zipper Insertion
Inserting a zipper with the Kenmore Mini Ultra demands a steady hand and the correct presser foot – a zipper foot is highly recommended. Begin by pinning the zipper tape to your fabric, ensuring the zipper teeth are aligned with the fabric edge. Select a straight stitch and adjust the stitch length appropriately for your fabric weight.

Using the zipper foot, carefully stitch along the zipper tape, keeping the teeth consistently close to the edge of the foot. Slowly guide the fabric, pivoting as needed to follow the zipper’s curve. Backstitch at the beginning and end of each seam for added security.
Practice on scrap fabric first to refine your technique. Remember, consistent speed and precise alignment are crucial for a professional-looking zipper insertion.
Using Attachments and Presser Feet
Enhance your Kenmore Mini Ultra’s capabilities with available attachments and presser feet! While specific options vary, a zipper foot is invaluable for close-to-edge stitching. A buttonhole foot simplifies buttonhole creation, ensuring consistent results. Explore options for gathering, quilting, or decorative stitching.
To change feet, loosen the screw on the presser foot holder and gently remove the existing foot. Align the new foot under the holder and tighten the screw securely. Ensure the foot is firmly attached before beginning to sew.
Refer to your machine’s manual for a complete list of compatible attachments and detailed instructions on their use. Experiment to unlock the full potential of your Mini Ultra!
Resources and Support
Find official Kenmore manuals online, explore sewing communities like Reddit (r/SewingMachinePorn, r/vintagesewing), and utilize Sears Parts Direct for PDF downloads.
Finding the Official Manual (PDF Download)
Locating the official Kenmore Mini Ultra sewing machine manual in PDF format can significantly enhance your sewing experience. Several online resources offer access to these valuable documents. Sears Parts Direct is a particularly useful platform, providing free PDF manuals for many vintage Kenmore sewing machines, potentially including models similar to the Mini Ultra.
Additionally, websites dedicated to Kenmore sewing machine manuals, such as kenmoresewingmanuals.com, compile a collection of instruction and service manuals available for instant download or printed copies. Reddit communities, like r/SewingMachinePorn and r/vintagesewing, have also proven helpful, with users sharing links and information regarding manual locations. A user on Reddit even successfully located a manual in December 2023. Thorough searching across these platforms should yield the necessary documentation for your machine.
Kenmore Sewing Machine Manual Websites
Numerous websites specialize in hosting Kenmore sewing machine manuals, offering a convenient way to access documentation for your Mini Ultra. Kenmoresewingmanuals.com stands out as a dedicated resource, providing both instruction and service manuals for a wide range of Kenmore models. These manuals are often available for immediate download, saving you time and effort.
Sears Parts Direct is another valuable platform, frequently offering free PDF manuals for vintage Kenmore machines. While specifically searching for the “Mini Ultra” model might be necessary, exploring similar model numbers (like 158.17851) could yield compatible documentation. Online forums and communities, such as those found on Reddit, also frequently share links to helpful manual resources, providing a collaborative approach to finding the information you need.
Online Sewing Communities and Forums
Engaging with online sewing communities and forums provides a wealth of knowledge and support for Kenmore Mini Ultra users. Reddit’s r/SewingMachinePorn and r/vintagesewing are excellent starting points, offering discussions and shared experiences. Users frequently post inquiries about specific models, including the Mini Ultra, and often share links to manuals or troubleshooting advice.
These platforms allow you to connect with experienced sewists who may have encountered similar issues, such as bobbin tangling – a common problem reported with the Mini Ultra. Participating in these communities can offer practical solutions, tips for maintenance, and a sense of camaraderie. Don’t hesitate to ask questions and contribute your own experiences to help others!