Pillow Talk Vape Instructions: A Comprehensive Guide
Navigating the world of vaping can be complex, but this guide simplifies the Pillow Talk Vape experience. We’ll cover everything from initial setup to maintenance, ensuring optimal performance and enjoyment.
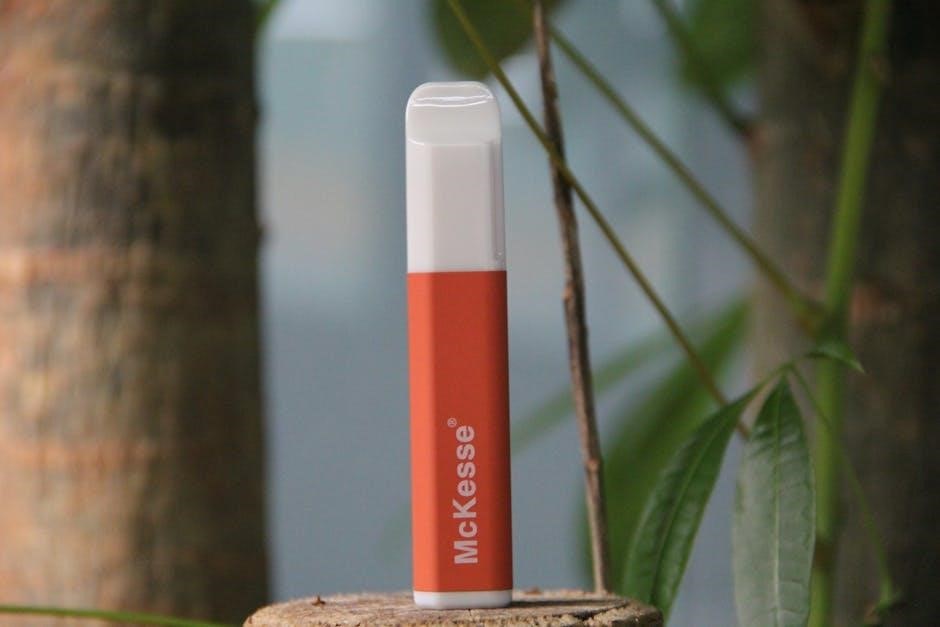
What is the Pillow Talk Vape?
The Pillow Talk Vape represents a relatively new entrant into the rapidly evolving vaping market, quickly gaining attention for its discreet design and user-friendly operation; Unlike traditional, bulky vape devices, the Pillow Talk Vape is engineered for portability and subtlety, often resembling a common everyday object – hence the name. This makes it an appealing option for vapers seeking a less conspicuous alternative.
It’s primarily designed for use with nicotine salts e-liquids, delivering a satisfying nicotine hit with a smoother throat sensation compared to traditional freebase nicotine. The device typically features a pod system, meaning it utilizes pre-filled or refillable pods containing the e-liquid. This simplifies the filling process and minimizes mess.
The Pillow Talk Vape aims to provide a convenient and accessible vaping experience, particularly for those transitioning from smoking or seeking a streamlined vaping solution. Its compact size and ease of use contribute to its growing popularity, offering a modern take on personal vaping technology. Understanding its core features is the first step to maximizing your enjoyment.
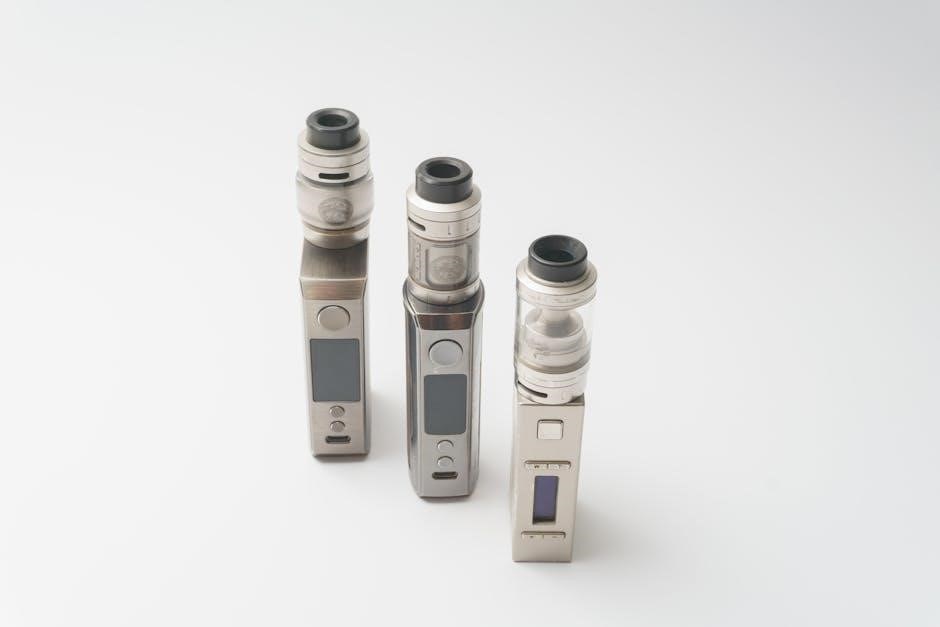
Understanding the Device Components
The Pillow Talk Vape, while compact, comprises several key components working in harmony. The battery forms the core, providing the power source for heating the e-liquid. Its capacity dictates vaping duration between charges. Connected to the battery is the pod, a small reservoir holding the e-liquid and containing the coil – the heating element that vaporizes the liquid.
Many models feature a draw-activated firing mechanism, eliminating the need for buttons; simply inhaling activates the device. Some versions include a power button for manual control. A USB charging port allows for convenient recharging of the battery. The airflow inlets regulate the amount of air reaching the coil, influencing vapor production and draw resistance.
The LED indicator displays battery status and charging progress. Finally, the outer casing protects the internal components and contributes to the device’s overall aesthetic. Familiarizing yourself with each part is crucial for proper operation, maintenance, and troubleshooting. Knowing these components will help with coil replacement and filling the device correctly.
Charging Your Pillow Talk Vape
Proper charging is vital for maintaining the longevity and performance of your Pillow Talk Vape’s battery. Locate the USB charging port, typically found on the bottom or side of the device. Use the provided USB cable; third-party cables may not deliver the correct voltage, potentially damaging the battery.
Connect the cable to a reliable USB power source – a wall adapter (5V/1A recommended) or a computer USB port. The LED indicator will illuminate, often changing color to signify charging status. A red light usually indicates charging, while a green or white light signals a full charge.
Avoid overcharging; once fully charged, disconnect the device. Overcharging can degrade battery life. Charging time varies depending on the battery capacity and power source, typically ranging from 30 minutes to 2 hours. Do not use the device while it’s charging. Always inspect the charging port for debris before connecting the cable. Consistent, proper charging habits will ensure a consistently enjoyable vaping experience.
Filling the Pillow Talk Vape with E-Liquid
Before filling your Pillow Talk Vape, ensure the device is turned off and the tank is detached from the battery. Locate the e-liquid filling port, usually a small opening on the top or bottom of the tank. Gently remove any protective caps or seals.
Carefully add e-liquid, avoiding the central airflow tube. Use a bottle with a fine tip applicator for precision. Do not overfill; leave a small air gap at the top of the tank to prevent leakage. Most tanks have a maximum capacity indicated on the device itself.
Wipe away any spilled e-liquid from the tank and device with a clean cloth. Reattach the tank securely to the battery. After filling, it’s crucial to allow the e-liquid to saturate the coil – this process is called ‘priming’ (see the next section). Using high-quality e-liquid compatible with your device is recommended for optimal flavor and performance. Always store e-liquid safely, away from children and pets.
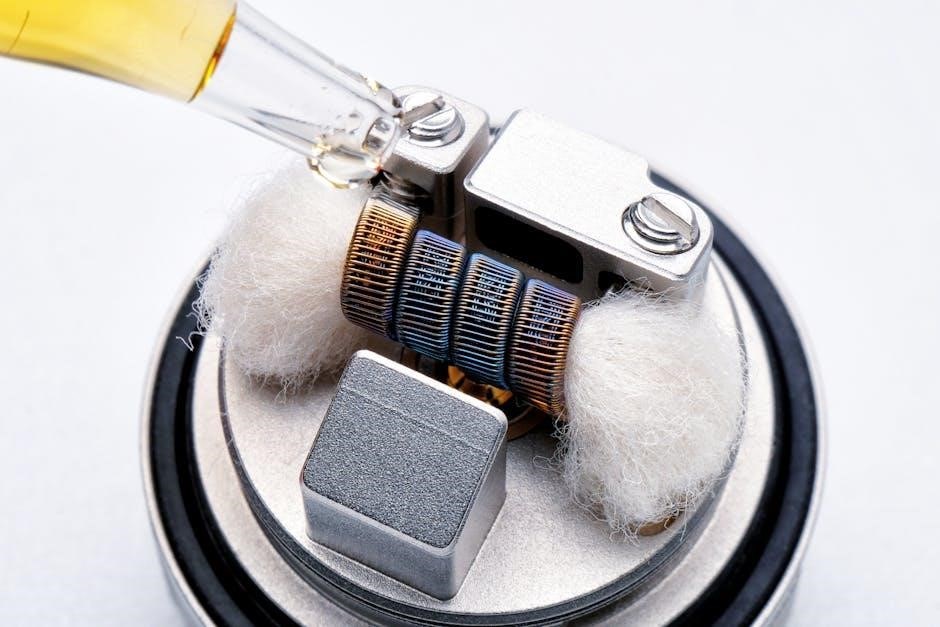
Priming the Coil
Priming the coil is a vital step after filling your Pillow Talk Vape with e-liquid. It ensures the wick is fully saturated, preventing a dry hit – a harsh, unpleasant experience. A dry hit can also damage the coil prematurely.
There are several priming methods. The simplest is to allow the tank to sit for 5-10 minutes after filling, letting the e-liquid wick through the coil naturally. For faster priming, take a few small puffs (without pressing the fire button) to draw e-liquid into the wick.

Alternatively, you can apply a few drops of e-liquid directly onto the exposed wicking material through the fill port. Be careful not to over-saturate. Begin vaping at a low wattage and gradually increase it as the coil becomes fully primed. You’ll know the coil is primed when you get a consistent, flavorful vapor. If you still experience a dry hit, repeat the priming process. Proper priming extends coil life and enhances your vaping experience.
Powering On/Off the Device
The Pillow Talk Vape utilizes a simple five-click operation for powering the device on and off. This safety feature prevents accidental activation while the device is stored or transported, conserving battery life and minimizing potential risks.
To turn the device ON, quickly press the fire button five times in succession. You’ll likely see the display screen illuminate, confirming the device is active. A brief vibration or visual cue may also indicate successful activation;
To power OFF the device, repeat the same process – five rapid clicks of the fire button. The display screen will turn off, signifying the device is in standby mode. Ensure the device is completely powered off before storing it in a bag or pocket to avoid unintended operation.
If the device doesn’t respond to the five-click method, ensure your fingers are dry and applying firm, consistent pressure. If issues persist, consult the troubleshooting section or contact customer support.
Adjusting Wattage/Voltage Settings
The Pillow Talk Vape allows for customizable power output, enabling you to tailor your vaping experience. Adjusting wattage or voltage impacts vapor production, flavor intensity, and overall throat hit. Understanding these settings is crucial for optimal enjoyment.
Wattage control is typically adjusted using the ‘+’ and ‘-’ buttons located on the device’s body. Pressing the ‘+’ button increases the wattage, while the ‘-’ button decreases it. The current wattage level is displayed on the screen. Start with a lower wattage and gradually increase it until you find your preferred setting.
Some Pillow Talk Vape models may also offer voltage adjustment. Voltage control directly influences the power delivered to the coil. Similar to wattage, use the ‘+’ and ‘-’ buttons to modify the voltage. Be cautious when adjusting voltage, as higher settings can quickly deplete battery life and potentially cause a burnt taste.
Refer to your e-liquid’s recommended wattage/voltage range for optimal flavor and vapor production. Experimenting within safe limits is encouraged to discover your ideal vape.
Selecting Vape Modes (if applicable)
Certain Pillow Talk Vape models feature variable vape modes, offering diverse vaping experiences tailored to individual preferences. These modes adjust power delivery and coil heating characteristics, impacting flavor, vapor density, and throat hit.

Common modes include: Variable Wattage (VW), Bypass, Temperature Control (TC – Nickel, Titanium, Stainless Steel), and potentially Curve modes. VW mode allows you to manually set the wattage output. Bypass mode delivers maximum power directly from the battery.
Temperature Control modes maintain a consistent vapor temperature, preventing dry hits and enhancing flavor. You’ll need a compatible coil for TC vaping. Curve mode allows for customized power curves throughout your draw.
To switch between modes, typically press the power button multiple times rapidly. The display screen will indicate the currently selected mode. Consult your device’s manual for specific instructions on mode selection and settings. Experimenting with different modes can unlock a wider range of vaping sensations.
Understanding the Display Screen
The Pillow Talk Vape’s display screen provides crucial information about your device’s status and settings. Familiarizing yourself with its indicators is essential for optimal operation and troubleshooting. Commonly displayed elements include: battery level, wattage/voltage output, resistance of the installed coil, current mode, puff count, and potentially temperature (in TC modes).
Battery level is usually represented by a bar graph or percentage. Wattage/Voltage indicates the power being delivered to the coil. Coil resistance (measured in ohms) confirms proper coil installation and compatibility. The display also shows the active vape mode – VW, Bypass, TC, etc.
Puff tracking monitors your vaping habits, while temperature displays (in TC mode) show the set and actual vapor temperature. Error messages will also appear on the screen, indicating potential issues like low battery, atomization errors, or short circuits. Refer to your device’s manual for a detailed explanation of all display icons and messages.
Replacing the Coil
Regular coil replacement is vital for maintaining optimal flavor and vapor production with your Pillow Talk Vape. Over time, coils accumulate residue and lose their ability to efficiently heat e-liquid. A burnt taste or diminished vapor are key indicators it’s time for a change.
First, ensure the device is powered off and remove the tank from the battery section. Depending on the tank design, the coil may be accessed from the top or bottom. Unscrew the coil base or remove the bottom cap. Gently pull the old coil straight down to remove it.
Before installing the new coil, inspect the O-rings for damage and apply a tiny amount of e-liquid to the coil’s wicking material. Screw in the new coil securely, but avoid over-tightening. Reassemble the tank and fill it with e-liquid. Prime the new coil (see priming instructions) before vaping; Always dispose of used coils responsibly.
Troubleshooting Common Issues: No Vapor
Experiencing no vapor from your Pillow Talk Vape can be frustrating, but several simple checks can often resolve the issue. First, ensure the device is powered on and the battery is adequately charged. A low battery is a common culprit. Verify the tank is properly attached to the battery section and securely tightened.
Next, check the e-liquid level in the tank. An empty tank will obviously produce no vapor. Confirm the coil is properly saturated with e-liquid. If the coil is dry, allow it to sit for a few minutes to wick more liquid. Try increasing the wattage or voltage setting gradually.
Inspect the coil for any visible damage or buildup. A burnt or clogged coil may need replacing. Ensure the airflow is not obstructed. Clean the airflow holes if necessary. If the problem persists, try a different coil to rule out a faulty component. Finally, consult the device’s manual or manufacturer’s website for further assistance.
Troubleshooting Common Issues: Leaking
Leakage from your Pillow Talk Vape can be messy and inconvenient, but often has a straightforward solution. Begin by checking the tank for cracks or damage. Even a small fissure can cause leaks. Ensure the tank is properly tightened to the battery base, but avoid over-tightening, which can damage the seals.
Inspect the coil for correct installation. A loosely fitted coil is a common cause of leaks. Verify the o-rings (rubber seals) on the coil and tank are present and in good condition. Replace any damaged o-rings immediately. Avoid overfilling the tank; leave some space at the top.
When filling, be careful not to get e-liquid in the central airflow tube. Keep the device upright during filling and vaping. If leaking occurs from the airflow holes, the coil may be faulty. Try a different coil. Regular cleaning of the tank and connections can also prevent leaks. If the problem continues, consult the manufacturer’s support resources.
Troubleshooting Common Issues: Burning Taste
Experiencing a burning taste while vaping your Pillow Talk Vape is unpleasant and indicates an issue needing immediate attention. The most frequent cause is dry hitting – vaping when the coil has insufficient e-liquid. Ensure your tank is adequately filled and the coil is properly saturated before vaping.
If you’ve recently changed the coil, it may require a longer priming period. Allow several minutes for the e-liquid to fully absorb into the wick. Reduce your wattage/voltage; a higher setting can burn the e-liquid faster than the wick can deliver it. Check the e-liquid; some e-liquids, particularly those with high VG content, require lower wattage settings.
A buildup of carbonization on the coil can also cause a burnt taste. Replace the coil regularly, even if it hasn’t run dry. Avoid chain vaping, giving the coil time to cool and re-saturate between puffs. If the burning taste persists after trying these steps, discontinue use and inspect the device for any damage.
Safety Precautions
Prioritizing safety is crucial when using your Pillow Talk Vape. Always keep the device out of reach of children and pets, as e-liquids contain nicotine, a highly addictive substance; Never use a damaged device or charger; inspect for cracks or fraying before each use. Avoid extreme temperatures – do not leave the vape in direct sunlight or a hot car.
Only use e-liquids specifically designed for vaping and from reputable sources. Do not ingest e-liquid; it is toxic if swallowed. If e-liquid comes into contact with skin or eyes, rinse thoroughly with water and seek medical attention if irritation persists. Be mindful of battery safety; do not short-circuit, puncture, or disassemble the battery.
Dispose of used coils and e-liquid containers responsibly, following local regulations. Avoid overcharging the device; disconnect it once fully charged. If you experience any adverse effects, such as dizziness or nausea, stop using the vape immediately and consult a healthcare professional.
Cleaning and Maintenance
Regular cleaning and maintenance will extend the life of your Pillow Talk Vape and ensure optimal performance. Begin by wiping down the exterior of the device with a soft, dry cloth to remove any dust or residue. Avoid using abrasive cleaners or solvents, as these can damage the finish.
Periodically clean the charging port with a cotton swab to remove any lint or debris. Inspect the tank for any cracks or leaks and address them promptly. When changing coils, ensure the connection points are clean and free of e-liquid buildup. Rinse the tank with warm water after emptying it, but avoid getting water inside the device’s electronics.

Pay attention to the mouthpiece, cleaning it regularly with a damp cloth or alcohol wipe. Store your vape in a cool, dry place when not in use, protected from direct sunlight and extreme temperatures. Avoid dropping the device, as this can cause internal damage. Consistent care will keep your Pillow Talk Vape functioning smoothly.
E-Liquid Compatibility
The Pillow Talk Vape is designed to be compatible with a wide range of e-liquids, but understanding compatibility is crucial for optimal performance and longevity. Generally, vape juices with a VG/PG ratio of 50/50 to 70/30 work best, providing a balance between flavor and vapor production.
Avoid using excessively thick or high-VG e-liquids, as they may not wick properly and could lead to a burnt taste. Lower-nicotine e-liquids are often recommended for extended coil life. Be cautious with fruit-based e-liquids, as their sugars can cause faster coil degradation. Menthol and mint-flavored e-liquids can sometimes affect the taste of subsequent flavors, so consider dedicating a tank to these.
Always ensure your e-liquid is sourced from a reputable vendor and contains high-quality ingredients. Avoid using e-liquids with unknown or questionable compositions. Experiment with different flavors and nicotine strengths to find your preference, but always prioritize safety and quality. Proper e-liquid selection enhances your vaping experience.
Where to Find Additional Support & Warranty Information
For comprehensive support and detailed warranty information regarding your Pillow Talk Vape, several resources are readily available. Begin by visiting the official Pillow Talk Vape website; a dedicated FAQ section addresses common queries and troubleshooting steps. You’ll also find downloadable user manuals offering in-depth guidance.
Direct customer support is accessible via email and live chat, typically available during standard business hours. Social media channels, such as Facebook and Instagram, often host active communities where users share tips and solutions. Warranty claims generally require proof of purchase and fall under a standard one-year manufacturer’s defect warranty.

Authorized retailers may also provide local support and assistance. Keep your purchase receipt for warranty purposes. Register your device online to expedite any future claims. Review the warranty terms and conditions carefully for specific coverage details and exclusions. We are committed to ensuring your satisfaction.